- Category:
- Workflow Tips
- Summary:
- From selection tools to text, brushes, shapes, and pixel-art workflows — master every anti-aliasing setting in Photoshop.
From selection tools to text, brushes, shapes, and pixel-art workflows — master every anti-aliasing setting in Photoshop.
The short answer
Anti-aliasing softens jagged pixel edges by averaging colour between the edge and background. You control it per tool:
-
✅ Selection tools – check/uncheck Anti-alias in the options bar.
-
✅ Quick Selection / Object Selection – choose Hard Edge in the bar.
-
✅ Type – pick None, Sharp, Crisp, Strong, or Smooth in the Character panel.
-
✅ Brush – anti-aliased by default; switch to Pencil for hard edges.
-
✅ Shape layers – always anti-aliased; use Pencil in Pixel mode as a workaround.
-
✅ Pixel art – set Image Interpolation to Nearest Neighbor and use the Pencil tool.
Understand What Anti-Aliasing Does to Your Edges
Anti-aliasing works by averaging the colour of edge pixels with the background colour, creating a smooth visual transition where a sharp diagonal or curve would otherwise appear stair-stepped (a phenomenon known as aliasing). According to Adobe's official documentation, this effect is confined to the outermost 1–2 pixels of an edge — it does not blur inward or outward the way feathering does.
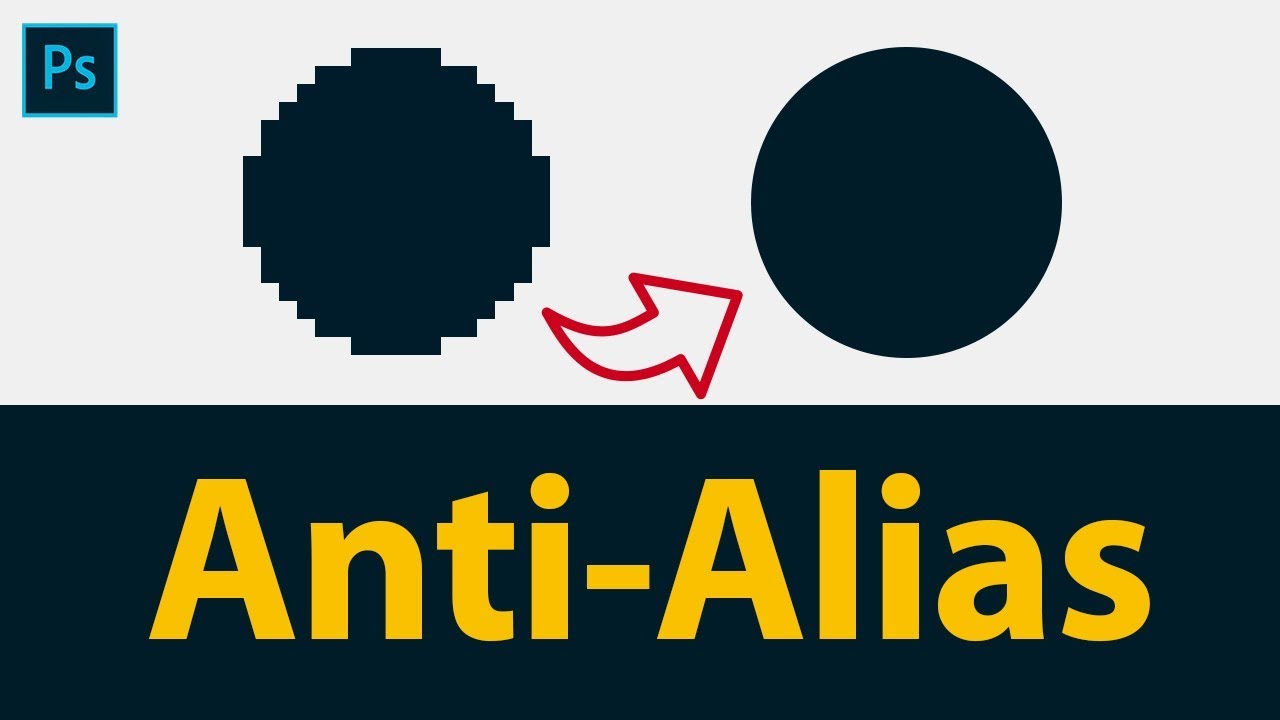
Aliased edge (left) vs. anti-aliased edge (right). The anti-aliased version blends edge pixels with the background to create a smooth curve.
Anti-aliasing vs. feathering: Feathering applies a blur that extends both inside and outside a selection over a user-defined radius — often 5 px, 10 px or more. Anti-aliasing, by contrast, is fixed to roughly 1–2 px and only touches the boundary pixels. Adobe's Photoshop Elements help page draws the same distinction: anti-aliasing smooths the step, feathering creates a gradual fade.
⚠️ Caution — terminology trap
Some third-party blogs (including ProEdu) claim Photoshop uses MSAA, FXAA or TAA — terms borrowed from 3D game rendering. Adobe's own documentation never uses these terms. Photoshop applies a simple per-tool pixel-averaging algorithm, not multi-sample or temporal anti-aliasing. You will not find MSAA, FXAA or TAA anywhere in the Photoshop interface.

At 1580% zoom, the difference becomes clear: the anti-aliased edge (smooth) uses blended intermediate pixels, while the aliased edge (jagged) shows a pure stair-step pattern.
Turn Anti-Aliasing On or Off for Selection Tools
Find the Anti-Alias Checkbox in the Options Bar
Photoshop's classic selection tools — Lasso, Polygonal Lasso, Magnetic Lasso, Elliptical Marquee, and Magic Wand — each have a dedicated Anti-alias checkbox in the options bar. Select any of these tools and look for the checkbox near the top of the screen. When checked, the resulting selection edge will be smooth; uncheck it for a hard, pixel-aligned edge. Adobe's official Photoshop help page confirms this behaviour for all five tools.
Use Hard Edge for Quick Selection and Object Selection
In newer versions of Photoshop (CC 2018 and later), the Quick Selection and Object Selection tools do not show a traditional checkbox. Instead, the options bar offers a Hard Edge toggle. According to an Adobe Community discussion, switching to Hard Edge eliminates the soft edge blending that these tools apply by default. This is especially useful when you need a crisp mask for graphic elements or pixel art.
Fix the Missing Anti-Alias Checkbox on Mac
A number of Mac users report that the Anti-alias checkbox simply does not appear in the options bar. The cause is a workspace setting called Narrow Options Bar. To restore the checkbox, go to Photoshop > Preferences > Workspace and uncheck Enable Narrow Options Bar, then restart Photoshop. This fix is documented in an Adobe Community thread and has resolved the issue for many users.
Control Anti-Aliasing for the Type Tool
Text in Photoshop is anti-aliased by default. You can change this in the Character panel (Window > Character) or via the Type menu at the top: Type > Anti-Alias. There are five modes:
-
None — no smoothing; produces jagged, pixel-aligned text.
-
Sharp — light anti-aliasing; keeps edges relatively crisp while removing obvious jaggies.
-
Crisp — slightly more smoothing than Sharp.
-
Strong — heavier anti-aliasing; thicker, heavier letterforms.
-
Smooth — maximum anti-aliasing; softest, roundest edges.

Jagged text (left) vs. anti-aliased text (right) at high magnification. The anti-aliased version uses blended edge pixels for a smooth appearance.

Split-screen comparison: text set to None (left) shows visible jaggies, while Smooth (right) produces rounded, softer letterforms.
Choose the Right Anti-Aliasing Mode for Your Text Size
Based on community testing (including this breakdown by Brent Galloway), here are practical guidelines:
-
Below 10 pt: Use None or Sharp. Anti-aliasing at very small sizes can make text appear muddy or blurry rather than smooth.
-
10–20 pt: Sharp or Crisp give a clean, professional look without visible jaggies.
-
Above 20 pt: Smooth or Strong produce the most polished results for headlines and large display type.
Use Anti-Aliasing with Brush and Pencil Tools
The Brush tool always applies anti-aliasing — there is no checkbox to disable it. Every stroke you paint will have soft, feathered edges. The Pencil tool, by contrast, draws with 100% hard, aliased edges; it never anti-aliases. A StackExchange discussion confirms this fundamental difference.
When to use which:
-
Brush — soft painting, photo retouching, blending, smooth gradients, organic shapes.
-
Pencil — pixel art, 1-pixel lines, crisp borders, hard-edged icons, UI elements.
If you need a perfectly straight, 1-pixel-wide border with no softness, switch to the Pencil tool (shortcut N; Shift+N cycles through hidden pencil variants). There is no way to make the Brush tool produce a hard edge — you must change tools.
Deal with Anti-Aliasing on Shape Layers
Shape layers in Photoshop are vector objects. They are always rendered with anti-aliasing at display time, and there is no checkbox or setting to turn it off. As confirmed by Reddit users in a detailed thread, this is a deliberate design choice — vector shapes are intended to look smooth at any size.
Workaround for hard edges: Instead of drawing in Shape mode, switch the shape tool's mode to Pixel in the options bar (the third of three mode icons: Shape, Path, Pixel). Then use the Pencil tool to draw the shape — it will render without anti-aliasing. Alternatively, rasterise the shape layer (Layer > Rasterize > Shape) and clean up edges with the Pencil tool.
💡 Expert tip
If you need a precise geometric shape without anti-aliasing — say, a hard-edged rectangle for UI — create it as a selection with Anti-alias unchecked, then fill it on a new layer. This bypasses the shape layer's vector rendering entirely.
Build a Complete Pixel Art Workflow with No Anti-Aliasing
For pixel artists, the presence of anti-aliasing anywhere in the pipeline can ruin hours of work. A comprehensive solution was posted by Reddit user chain83 in the same pixel-art anti-aliasing thread. Here is the full workflow:
-
Set global interpolation to Nearest Neighbor. Go to Photoshop > Preferences > General > Image Interpolation and choose Nearest Neighbor (preserve hard edges). This affects all scaling and transform operations, keeping pixels sharp.
-
Draw exclusively with the Pencil tool. Hotkey
N/Shift+N. The Pencil never anti-aliases, making it the only safe drawing tool for pixel work. -
For shapes, use Pencil in Pixel mode. Select a shape tool, set the mode to Pixel, and draw with the Pencil. This bypasses the always-anti-aliased vector shape layer.
-
Harden soft selections with Quick Mask + Threshold. After creating a selection that has soft edges (e.g. from the Magic Wand), press
Qto enter Quick Mask, then go to Image > Adjustments > Threshold and set it to 128. Exit Quick Mask (Q) — the selection is now hard-edged. -
For existing layers with semi-transparent pixels: Go to Layer > Layer Mask > From Transparency, then apply Threshold (128) to the mask. This eliminates any partially transparent anti-aliased pixels.
-
Record as Photoshop Actions. Steps 4 and 5 can be recorded as Actions for one-click application. This saves significant time when processing multiple images.
Fix White Fringe (Halo) Around Filled Selections
When you fill a selection — for example, colouring line art — anti-aliased edge pixels that originally blended with a white background can remain as a pale halo. This problem is well documented on the Graphic Design Forum. Here are three reliable fixes:
Fix 1 — Expand the selection before filling. With your selection active, go to Select > Modify > Expand and enter 1–2 px (depending on your image resolution). Then fill. The expanded selection covers the blended edge pixels.
Fix 2 — Use Defringe. After filling, go to Layer > Matting > Defringe and set a radius of 1–2 px. This removes the leftover halo pixels by replacing them with neighbouring colour values.
Fix 3 — Use Layerbench's edge cleanup (Minimum shrink). The Layerbench plugin offers a dedicated edge-cleanup panel that applies a mask Minimum (shrink) at a user-supplied radius of 1 px, 2 px, or 3 px. This trims away the translucent fringe pixels from an existing mask without re-cutting the selection.
Before: White halo visible around filled area. Anti-aliased edge pixels retain the white background colour.
After (expand + fill): Clean, fringe-free fill. The expanded selection covers the blended pixels, producing a solid edge.
Apply Anti-Aliasing to Existing Hard Edges
What if you have a shape with jagged, aliased edges and you want to add anti-aliasing after the fact? This question came up on StackExchange, where users noted that Photoshop has no single "add anti-aliasing" filter. Here are the closest alternatives:
-
Gaussian Blur + Levels. Duplicate the layer, apply a very small Gaussian Blur (0.5–1 px), then use a Levels adjustment with the sliders pulled toward the centre to tighten the transition. This creates a narrow blend zone that mimics anti-aliasing, though it is not an exact match.
-
Smudge tool. With a very small brush (1–3 px) and low strength (20–30%), gently drag the Smudge tool along the edge to push colour into the background pixels. This is a manual, time-consuming method but gives precise control.
📝 Note
There is no one-click "apply anti-aliasing" command in Photoshop. The best approach is to capture the edge correctly from the start — use a selection with Anti-alias checked, or draw with the Brush tool for a naturally soft edge.
Decide When to Keep Anti-Aliasing and When to Turn It Off
Not every project needs the same edge treatment. The table below maps common reader situations to the right anti-aliasing strategy, drawing on the Adobe documentation and community experience.
| Situation | Keep anti-aliasing? | Best tool / setting |
|---|---|---|
| Photo retouching & composites | ON | Selection tools with Anti-alias checked |
| UI design — buttons, icons | ON for curves, OFF for 1 px borders | Pencil for borders; selections with anti-alias for rounded elements |
| Pixel art | OFF | Pencil tool, Nearest Neighbor interpolation, Quick Mask + Threshold |
| Small text (<10 pt) | OFF or Sharp | Type anti-aliasing set to None or Sharp |
| Large headlines (>20 pt) | ON | Type anti-aliasing set to Smooth |
| Shape layers | ON (no choice) | Rasterise and use Pencil if hard edges are essential |
| Line art colouring | ON (manage fringe) | Use expanded selection (1–2 px) or Defringe after filling |
The principle: If you need crisp, pixel-sharp edges — pixel art, 1 px borders, very small text — disable anti-aliasing wherever possible. For natural-looking images, composites, and large type, keep anti-aliasing on and handle any halo issues with expansion or defringe.
Photoshop gives you granular control over anti-aliasing for selections, text, and painting tools. The only tool category that resists control is shape layers, and even that has a workaround. By matching your anti-aliasing strategy to the specific task at hand, you avoid both unwanted jaggies and the soft halos that can spoil an otherwise clean composition.