- Category:
- Workflow Tips
- Summary:
- Learn how to combine layers in Photoshop using Ctrl+E, Stamp Visible, and other methods while preserving originals or flattening for final export.
The short answer
To combine layers, press Ctrl+E (Win) / Command+E (Mac) to merge selected layers into one, or use Ctrl+Shift+Alt+E (Win) / Shift+Command+Option+E (Mac) to create a new merged layer from all visible layers while keeping originals. Flatten Image merges everything into a single background layer but discards hidden layers. Choose based on whether you need to preserve your original layers.
Which merge method should you use?
Your choice depends on one question: do you need to keep the original layers intact? If you are still editing and may want to tweak individual elements later, pick a non‑destructive method. If you are exporting a final version and want the smallest file, flattening makes sense. Below is a quick comparison of every method covered in this article.
| Method | Preserves originals? | Best use case |
|---|---|---|
| Merge Selected (Ctrl+E) | No | Combine a few specific layers into one |
| Merge Down | No | Merge one layer into the layer below it |
| Merge Visible (Ctrl+Shift+E) | No | Collapse all visible layers onto the active layer |
| Stamp Visible (Ctrl+Shift+Alt+E) | Yes | Create a new merged layer without altering originals |
| Flatten Image | No (hidden layers lost) | Final export; smallest file size |
| Copy Merged (Ctrl+Shift+C) | Yes | Paste a flat copy while keeping every original layer |
As a rule of thumb: if there is any chance you will need to re‑edit a layer later, use Stamp Visible or Copy Merged. Reserve Flatten and Merge Visible for when you are certain the composition is final.
Step-by-step: the 5 ways to combine layers in Photoshop
Below are the core merging procedures you will use day to day. Each method is self‑contained; read the one that matches what you are trying to do right now.
1 Merge selected layers (Ctrl+E)
This is the most direct way to combine two or more layers. Select the layers you want to merge in the Layers panel:
- Contiguous layers — click the first, then Shift+click the last.
- Non‑contiguous layers — Ctrl+click (Win) / Cmd+click (Mac) each layer.
Then press Ctrl+E (Win) / Command+E (Mac), or right‑click and choose Merge Layers. The content from all selected layers collapses into a single layer; where they overlap, the top layer’s pixels replace those below.
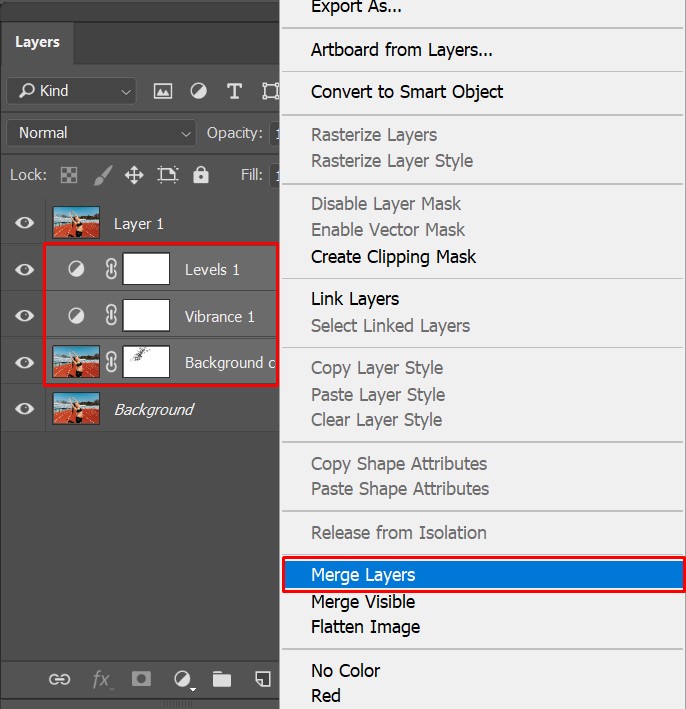
The right‑click menu with “Merge Layers” ready to apply.
Tip: If the menu option is grayed out, check that none of the selected layers are locked, hidden, or a Background layer — see the troubleshooting section below.
2 Merge Down
Merge Down combines the active layer with the pixel layer directly beneath it. Select the top layer and press Ctrl+E (Win) / Command+E (Mac), or go to Layer > Merge Down.
Critical limitation: the layer below must be a pixel layer. It will not work if the layer below is a Smart Object, an adjustment layer, a text layer, or a Generative Fill layer — unless you rasterize it first. To rasterize, right‑click the layer and choose Rasterize Layer.
⚠️ Warning
Merge Down also fails if the target layer is hidden. Unhide the layer below before merging.
3 Merge Visible and Stamp Visible
These two shortcuts are often confused — the only difference is the Alt key, and it changes whether you keep your originals.
- Merge Visible (
Ctrl+Shift+E/Command+Shift+E) — merges all visible layers onto the currently selected layer. The original visible layers are replaced by the merged result. - Stamp Visible (
Ctrl+Shift+Alt+E/Shift+Command+Option+E) — creates a brand‑new layer at the top of the stack containing the merged content. All original visible layers remain untouched.
Many users accidentally hit the wrong shortcut and wonder why their layers disappeared. If your goal is to preserve the originals, always include the Alt (or Option) key.

Before (left) and after (right) merging a stack of visible layers into one.
4 Flatten Image
Choose Layer > Flatten Image or right‑click any layer and select Flatten Image. This combines every visible layer into a single Background layer and discards hidden layers permanently.
⚠️ Warning
Flatten is the most destructive merge. Hidden data is gone after the action — there is no “unflatten.” Always duplicate the PSD before flattening, or use Stamp Visible if you only need a flat copy.
Use Flatten only when you are completely finished editing and want the smallest possible file for delivery or archiving.
5 Merge groups and clipping masks
Merge a Group: select the group folder in the Layers panel, then go to Layer > Merge Group or right‑click and choose Merge Group. The entire group collapses into a single pixel layer.
Merge a Clipping Mask: when you have a base layer with one or more layers clipped to it, right‑click the base layer. If the base is a pixel layer, the option reads Merge Clipping Mask; if the base is a shape layer, it reads Merge Layers. Either way, the result is the same: the base and all its clipped layers become one layer.
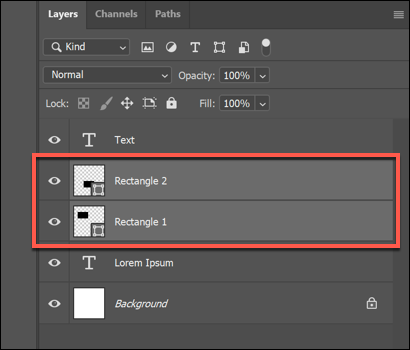
Shape layers and text layers in a stack — note that shape layers may need rasterization before merging.
6 Copy Merged — non‑destructive alternative
When you need a flat version of everything visible without altering the layer stack, use Copy Merged:
- Press
Ctrl+A(Win) /Command+A(Mac) to select the entire canvas. - Go to Edit > Copy Merged or press
Ctrl+Shift+C(Win) /Command+Shift+C(Mac). - Edit > Paste — a new flat layer appears at the top of the stack.
This leaves every original layer untouched and works especially well when you want to export a merged preview while keeping the full editability of the PSD.
💡 Tip
There is no single keyboard shortcut to merge only selected layers into a new layer while preserving the originals. The workaround: duplicate the selected layers first (Ctrl+J), then merge the duplicates. Or toggle visibility of unwanted layers off and use Stamp Visible.
Why can't you merge? Troubleshooting grayed‑out or unavailable options
One of the most common frustrations in the Adobe Community forums is the Merge option appearing grayed out. Here are the usual causes and how to fix each one.
🔒 Locked layer — Click the lock icon to unlock it.
👁️ Hidden layer — Only visible layers participate in a merge. Click the eye icon to show the layer.
⬜ Background layer — Double‑click the Background layer and rename it to convert it into a regular layer.
🔗 Linked layers — Unlink layers first (right‑click the link icon or select Layer > Unlink Layers).
📏 Different bit depth — All layers must share the same bit depth (e.g., 8‑bit). Check Image > Mode.
🧩 Incompatible type — Text, Smart Object, or shape layers must be rasterized before merging. Right‑click > Rasterize Layer.
If the layer below is a Smart Object or a Generative Fill layer, Merge Down will not work until you rasterize it — as noted in the XDA Developers guide on the topic. Rasterization converts those layers into plain pixel layers, after which merging proceeds normally.

Blending mode dropdown — ensure both layers use a compatible blend mode (Normal works universally).
How to combine layers without losing your originals
If you want to keep every layer editable for later revisions, use one of these approaches. They all produce a merged result while leaving the original layers completely untouched.
- Stamp Visible (
Ctrl+Shift+Alt+E/Shift+Command+Option+E) — the primary safe method. It places a new merged layer at the top of the stack. All originals remain. - Copy Merged (
Ctrl+Shift+Cafter selecting the canvas) — paste the result as a new layer. Good when you only need a flat copy of the visible content. - Duplicate then merge — select the layers you want to combine, duplicate them (
Ctrl+J), then merge the duplicates. The originals stay intact below. - Toggle visibility + Stamp Visible — turn off the layers you do not want in the merge, then Stamp Visible. Only the visible layers are captured in the new layer.
- Layer Comps — an advanced panel (Window > Layer Comps) that saves different visibility, position, and style states. You can create a comp with certain layers merged without actually merging them in the document.
💡 Undo is your friend
If you accidentally merge and haven’t saved and closed, pressCtrl+Z(Win) /Command+Z(Mac) or use the History panel (Window > History) to step back. Merging is reversible within the session — the warning about “destructive” editing applies after the file is saved and reopened. For Cloud Docs, Version History offers an additional safety net.
Working with special layer types: text, Smart Objects, and adjustment layers
Not all layers behave the same way during a merge. Here is what you need to know about the most common special cases.
Text, Smart Objects, and shape layers
These must be rasterized before they can be merged as pixel data. Right‑click the layer and choose Rasterize Layer. If you merge two Smart Objects without rasterizing, Photoshop embeds one inside the other — creating a nested Smart Object rather than a true pixel merge. According to the XDA Developers article, Merge Down specifically fails with Smart Objects and Generative Fills unless rasterized first.
Adjustment and fill layers
Adjustment layers (e.g., Curves, Levels, Hue/Saturation) and fill layers (e.g., Solid Color, Gradient) follow a special rule: they cannot be the target of a merge. As explained in Adobe’s HelpX documentation, this means you cannot select an adjustment layer and press Ctrl+E to merge it with the layer below. You can, however, merge an adjustment layer into the pixel layer beneath it — by selecting the pixel layer and using Merge Down. The adjustment then gets rasterized and permanently applied.
⚠️ Destructive by nature
Once an adjustment layer is merged into a pixel layer, its settings can no longer be tweaked. If you might want to change the adjustment later, keep it separate and use a layer group or Smart Object to organise your stack instead.
One more detail from Adobe: adjustment and fill layers with only white masks do not significantly increase file size, so merging them purely to save space is unnecessary — as noted in the same HelpX page.
Understanding Merge Visible vs. Stamp Visible — why the Alt key matters
This distinction causes more confusion in community forums than almost any other merging topic. The two shortcuts look nearly identical, and the single key that separates them — Alt (Win) / Option (Mac) — determines whether you preserve your original layers or replace them.
Here is exactly what each command does:
- Merge Visible —
Ctrl+Shift+E(Win) /Command+Shift+E(Mac). All visible layers are merged onto the currently selected layer. The other visible layers disappear; only the active layer remains, now carrying the merged content. This is destructive to the layer stack. - Stamp Visible —
Ctrl+Shift+Alt+E(Win) /Shift+Command+Option+E(Mac). A brand‑new layer is created above all existing layers, containing the merged result of every visible layer. Nothing in the original stack is changed.
The Alt (or Option) key is what Adobe added to repurpose the Merge Visible command into a non‑destructive variant. If you accidentally omit it, you get the destructive version. Many forum posts describe “Stamp Visible replaced my layers” — this happens when the user pressed Ctrl+Shift+E instead of Ctrl+Shift+Alt+E, or when a custom shortcut overrode the default.
💡 Practical test
Before relying on either shortcut in a real project, open a test document with three or four simple layers and run both commands. Observe how the layer count changes. This two‑minute test will make the Alt‑key difference unforgettable.
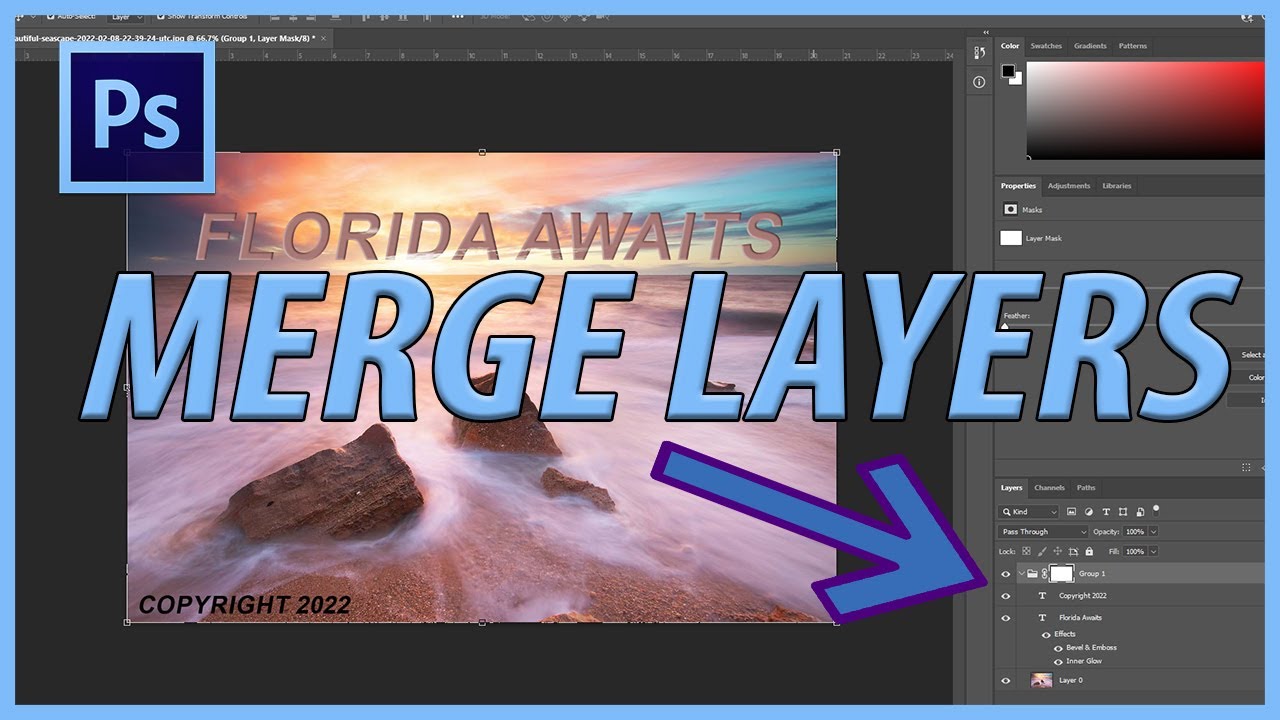
After Stamp Visible: a new merged layer appears at the top while all original layers remain below.
If you regularly need to merge only selected layers into a new layer — and there is no single shortcut for that — a reliable workaround is to duplicate the selected layers first and then merge the duplicates. Alternatively, toggle the visibility of layers you want to exclude, then use Stamp Visible. Both approaches are documented in the same Reddit thread where users share their everyday workflows.