- Category:
- Workflow Tips
- Summary:
- Layer via Cut — moves the selected pixels to a new layer, leaving transparency or the layer below in their place on the original
How to Create a New Layer from a Selection in Photoshop – Copy vs. Cut Methods Compared
Keep the original Ctrl+J Cmd+J
Layer via Copy — duplicates the selected area onto a fresh layer. The original layer stays completely untouched.
Remove from original Ctrl+Shift+J Cmd+Shift+J
Layer via Cut — moves the selected pixels to a new layer, leaving transparency (or the layer below) in their place on the original.
TL;DR: Use Ctrl+J when you want to keep the background intact. Use Ctrl+Shift+J when you want to isolate an object and delete it from its original layer. Both are accessible via Layer > New > Layer via Copy / Layer via Cut or by right‑clicking inside the selection.
What Does Layer via Copy (Ctrl+J) Do?
Layer via Copy takes the pixels inside your current selection on the active layer and duplicates them onto a brand‑new layer. The original layer is not altered in any way — every pixel stays exactly where it was.
This is the go‑to method when you need to extract a subject while keeping the background intact for later use, or when you want to create a composite element without destroying your source material.
-
Make a selection using any selection tool (Marquee, Lasso, Magic Wand, Quick Selection, etc.).
-
Press
Ctrl+J(Windows) orCmd+J(macOS). Alternatively, go to Layer > New > Layer via Copy, or right‑click inside the selection and choose Layer via Copy. -
A new layer appears directly above the active layer, containing only the pixels that were inside the selection. The original layer is unchanged.
As Reddit contributor chain83 explains, "a selection in Photoshop is completely independent from any layers. A selection designates pixels that will be affected when you do something to affect the selected area." The Ctrl+J command simply copies those designated pixels to a fresh layer.
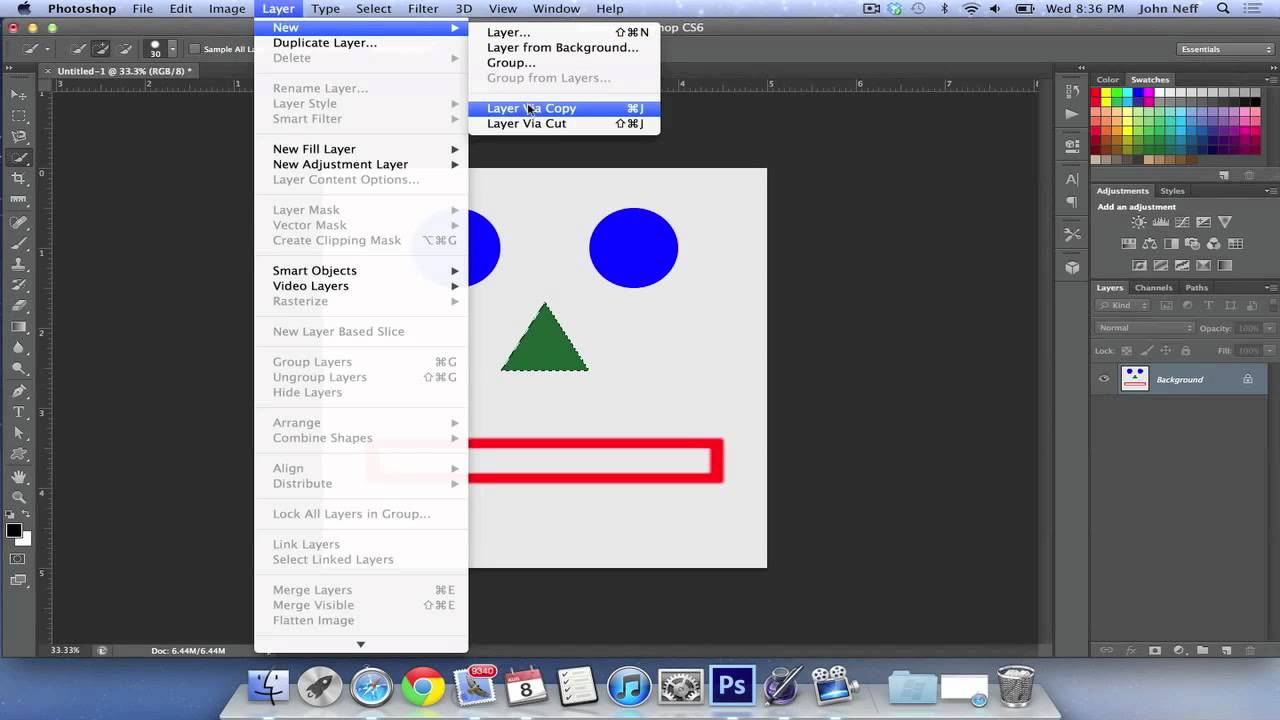
A selection active in the document; after pressing Ctrl+J, a new layer appears holding only the copied pixels.
What Does Layer via Cut (Ctrl+Shift+J) Do?
Layer via Cut moves the selected pixels to a new layer and removes them from the original layer, leaving a transparent hole (or revealing the layer below). This is the command that many users reach for when they discover that Ctrl+J alone doesn't delete the original content.
-
Make a selection on the layer that contains the pixels you want to relocate.
-
Press
Ctrl+Shift+J(Windows) orCmd+Shift+J(macOS). You can also use Layer > New > Layer via Cut, or right‑click inside the selection and choose Layer via Cut. -
The selected pixels are cut from the original layer and placed onto a new layer above it. The area they occupied becomes transparent.
This shortcut solves a frustrating workflow that one Reddit user described: "I need to select it, create a new layer with Ctrl+J, make the same selection again and only then I can remove it from the original layer. It just takes too many steps." The answer from BlandDandelion — "Use Ctrl+Shift+J instead" — was confirmed as solved by the original poster.
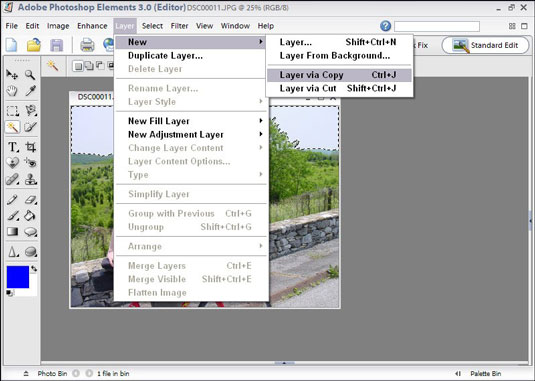
After Layer via Cut, the original layer has a transparent hole (left) and the new layer carries the moved pixels (right).
⚠ Destructive operation. Once you cut and save/close the file, the original pixels are gone from that layer. If you think you might need the original content later, consider using a layer mask instead (see below).
When Should You Use Layer via Copy vs. Layer via Cut?
| Criteria | Layer via Copy (Ctrl+J) |
Layer via Cut (Ctrl+Shift+J) |
|---|---|---|
| Original layer | Preserved intact — all pixels remain. | Selection removed; area becomes transparent. |
| Destructive? | No — original is safe. You can duplicate the selection multiple times. | Yes — the pixels are permanently removed from the source layer (unless undone via History). |
| Best when… | You need to keep the background as‑is (e.g., composite work, non‑destructive experimentation). | You want to isolate an object and delete it from the original (e.g., cleaning up a scanned image, separating a graphic element from a flat background). |
| Mask alternative? | Both methods can be replaced with a layer mask for fully non‑destructive editing. | Both methods can be replaced with a layer mask for fully non‑destructive editing. |
As noted by chain83 on Reddit, cutting is "generally bad (destructive)" compared to using a layer mask. For most non‑destructive workflows, a mask is the safer choice.
How Do I Use a Layer Mask as a Non‑Destructive Alternative?
A layer mask hides (rather than deletes) pixels. The mask is a grayscale image where white reveals, black conceals, and shades of grey give partial transparency. You can refine the mask at any time without permanently losing a single pixel.
-
Make your selection on the layer you want to isolate.
-
Click the Add Layer Mask icon at the bottom of the Layers panel (a rectangle with a circle inside).
-
A white mask thumbnail appears on the layer. The selected area is white (visible); everything outside the selection is black (hidden). The original pixels remain on the layer — they are simply masked out.
-
To refine the mask, use the Brush tool (paint with black to hide more, white to reveal), or use the Select and Mask workspace for complex edges like hair or fur.
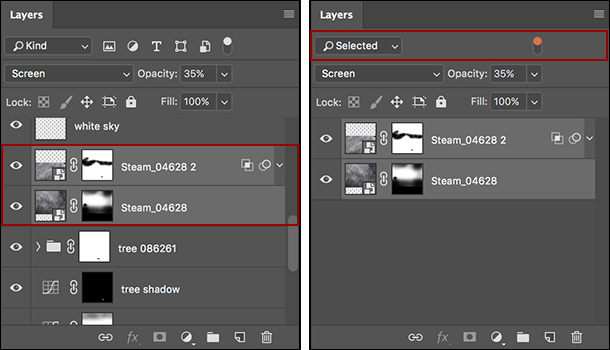
The Layer Mask button is at the bottom of the Layers panel. A single click converts your selection into a non‑destructive mask.
Mask vs. Cut — quick comparison: With a mask, nothing is removed; you can adjust the edge, soften the transition, or bring back hidden areas at any time. With Ctrl+Shift+J, the pixels are gone from the original layer. If you frequently cut out subjects, consider using masks as your default — they preserve full editability.
💡 Streamlined cutout workflow. If you isolate subjects regularly, a dedicated tool can speed things up. The Layerbench plugin panel for Photoshop runs Select Subject, creates a mask, and exports a transparent PNG — or cuts the subject to a new layer — in one click. It also offers edge cleanup (shrink mask by 1–3 px) to reduce background fringing.
How to Convert a Selection into a Vector Shape Layer
If you need a scalable, resolution‑independent shape (for logos, icons, or illustrations that must remain sharp at any size), you can convert a selection into a vector shape layer via a work path.
-
With the selection active, right‑click inside it and choose Make Work Path. (You can also click the Make work path from selection icon in the Paths panel.)
-
In the Layers panel, click the New Solid Color Fill Layer icon (a half‑filled circle). A vector mask is automatically applied to the fill layer, matching the path.
-
The result is a shape layer with a vector mask — infinitely scalable and editable via the Pen tool.
⚠ Path quality note. As Reddit contributor chain83 observed, "this results in a poor path compared to making it manually with the Pen tool." For production work, expect to clean up the path or draw it from scratch with the Pen tool for smooth, accurate curves.
Three screenshots showing the conversion of a selection into a vector shape layer via Work Path
Selection → Make Work Path → New Solid Color layer yields a vector shape layer (outcome shown at right).
What Are the Version‑Specific Settings for Shape Tools?
If you draw shapes with the Rectangle, Ellipse, Polygon, or Custom Shape tool, the way Photoshop creates a new layer for each shape depends on your version.
Pre‑CS6 (CS5, CS4, etc.): In the Options bar you'll see three icons: Shape Layer (leftmost), Path (middle), and Raster Shapes (rightmost). To put each new shape on its own layer, click the Shape Layer icon before drawing.
CS6 and later (including CC): A dropdown menu replaces the three icons. Make sure the option New Layer is selected. If it's set to Add to Shape Area, new shapes merge onto the currently active shape layer instead of creating a separate one.
🔍 Quick check: After drawing a shape, look at the Layers panel. If it appears on the same shape layer as your previous shape, undo and change the tool setting to New Layer before trying again.
Troubleshooting – Why Can't I Create a New Layer from My Selection?
Several issues can block the Layer via Copy or Layer via Cut commands. Here are the most common causes and their fixes.
“Layer via Copy / Layer via Cut is greyed out” No active selection. Use any selection tool (Marquee, Lasso, Magic Wand) to define an area first. The menu items will remain grey until a selection is present.
“I can't click the Create New Layer button”
A known bug in Photoshop 2020 changed the button icon to a square with a “+” — and some users found it unclickable. This was fixed in Photoshop 22.5.1. Update your copy via the Creative Cloud app. Workaround: use Ctrl+Shift+N or the Layer > New > Layer menu.
“Why can't I create new layers at all in this file?” Check Image > Mode. If it's set to Index Color (common for GIF, PNG‑8, and Bitmap files), new layers are prohibited. Convert to RGB or CMYK (Image > Mode > RGB Color) to enable layer creation.
“How do I create a new layer from a selection that spans multiple layers?”
No single command copies from all layers at once. Use Copy Merged (Ctrl+Shift+C / Cmd+Shift+C) to grab the visible pixels from all layers within the selection, then paste (Ctrl+V) onto a new layer. (Source: StackExchange discussion.)
“I can't interact with layers — clicks don't work”
This may be a transient UI lock. Try pressing Esc to exit full‑screen mode, or reset the workspace via Window > Workspace > Reset Essentials. (Reported in community forums as an occasional glitch.)
For the shape‑tool version issues and the Index Color limitation, this StackExchange thread provides additional context.
How to Check You Did It Right (Verification)
After applying any of the methods above, run through these checks to confirm the result matches your intent.
-
After Layer via Copy: Select the original layer — the selected area should still be fully intact. Toggle the new layer's visibility; it should show only the copied pixels against transparency.
-
After Layer via Cut: Toggle the new layer's visibility on and off. The original layer should have a transparent hole where the selection was. The new layer holds the moved pixels.
-
If you accidentally used Copy instead of Cut: The original layer still has all pixels. Press
Ctrl+Z(Undo) to remove the copy layer, then pressCtrl+Shift+Jinstead. -
After applying a layer mask: Click the mask thumbnail in the Layers panel. The selected area should be white (visible) and the unselected area black (hidden). The original pixels remain unchanged on the layer — the mask only controls visibility.
-
After vector shape conversion: Double‑click the shape layer's vector mask thumbnail. The path should match your original selection (though it may be rougher — see the warning above).
If the result doesn't match what you expected, review the troubleshooting section above. The most common mistake is forgetting to make a selection first — the Layer via Copy and Layer via Cut commands depend on an active selection boundary.