- Category:
- Workflow Tips
- Summary:
- How to photoshop a picture: follow a non‑destructive workflow—straighten before crop, duplicate layers, use adjustment layers for exposure and color edits.
Short answer: Open your image via File → Open, straighten with the Straightening Tool, crop non‑destructively (keep “Delete Cropped Pixels” off), duplicate the background layer, adjust exposure and colour with Adjustment Layers (Curves, Hue/Saturation), remove blemishes with the Spot Healing Brush or Clone Stamp, and export as JPEG or PNG. The five‑step table below gives you the complete sequence at a glance.
Quick Reference — The 5‑Step Photo Editing Workflow
Use this table as your go‑to checklist every time you edit. The steps follow the order recommended by Adobe — straighten before you crop to avoid losing edge detail.
| Step | Tool / Menu | Action | Pro Tip |
|---|---|---|---|
| 1 | File → Open | Import your image | Use Camera Raw first if you shoot RAW (recommended workflow) |
| 2 | Straightening Tool | Draw a line across the horizon | Photoshop auto-levels the photo — do this before cropping |
| 3 | Crop Tool | Set crop area; uncheck “Delete Cropped Pixels” | Non‑destructive cropping lets you re‑crop later |
| 4 | Image → Duplicate | Duplicate the background layer | Work on the copy so the original stays untouched |
| 5 | File → Export | Export as JPEG (web) or TIFF/PSD (print) | Use Stamp Visible (Cmd+Shift+Alt+E) to flatten a copy while keeping layers intact |
Why straighten first? If you crop before straightening, the auto‑level rotation may push content outside your cropped boundaries. Straightening first preserves the full frame.
Crop and Straighten Your Photo the Right Way
Getting the composition right is the fastest way to improve any image. Photoshop’s Straightening Tool and Crop Tool work together, and the order matters.
Use the Straightening Tool First
Select the Crop Tool (shortcut C), then click the Straighten icon in the options bar. Draw a line along a horizon, a building edge, or any element that should be horizontal. Photoshop rotates the image automatically. Adobe’s official tutorial recommends this as the first adjustment step.
Crop Non‑Destructively
In the Crop Tool options, uncheck “Delete Cropped Pixels”. This keeps the cropped‑away area hidden but available — you can re‑enter the Crop Tool later and adjust the frame. This is especially useful if you change your mind about composition after making other edits.
Rule‑of‑thirds grid: While in the Crop Tool, set the overlay to Rule of Thirds (press
Oto cycle through grids). Aligning key subjects along the grid lines creates more balanced photos.
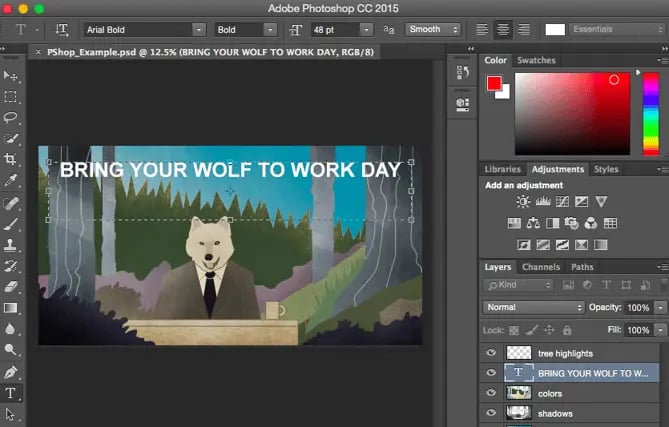
The Crop Tool with the Straighten option active — draw a line along a horizontal reference and Photoshop levels the image automatically.
The Complete Photo Editing Workflow — From Raw to Refined
This five‑step workflow takes you from a flat image to a polished result. Each step builds on the previous one, and every technique here is non‑destructive — meaning you can always go back and tweak without starting over.
Step 1 — Import and Duplicate Your Image
Go to File → Open and select your photo. Once it opens, duplicate the background layer by right‑clicking the layer in the Layers panel and choosing Duplicate Layer, or use Image → Duplicate. According to Adobe’s documentation, layers work like “translucent sheets” — each adjustment sits on its own layer, so you can toggle, mask, or delete it without harming the original pixels.
Name your layers. Double‑click the layer name and call it “Original” or “Base.” When you have 15 layers, clear names save you from guesswork.
Step 2 — Straighten and Crop Non‑Destructively
Follow the method described in the Crop and Straighten section. If you shot in RAW, do this step in Adobe Camera Raw (ACR) before opening the image in Photoshop — many experienced editors, such as the team at Digital Photography School, process white balance, exposure, and lens corrections in ACR first, then send the image to Photoshop for finishing.
Step 3 — Adjust Exposure, Colour, and Contrast
Use Adjustment Layers — they apply changes on a separate layer rather than directly to the pixel layer. Adobe groups them into three categories: tonal (Brightness/Contrast, Levels, Curves, Exposure, Vibrance, Hue/Saturation), colour (Color Balance, Photo Filter, Channel Mixer, Color Lookup), and black‑and‑white conversion.
For a quick contrast boost that looks natural: add a Curves Adjustment Layer, set its blend mode to Soft Light, and reduce Fill to about 55%. This method, shared by advanced Photoshop instructors, adds depth without the harshness of a standard contrast slider.
Reuse a mask across layers. Hold
Option(Mac) orCtrl(PC) and click‑drag a layer mask from one adjustment layer to another. This copies the mask without redoing it — a major time‑saver when you want the same selective adjustment on multiple settings.
Step 4 — Remove Unwanted Objects and Blemishes
Photoshop provides three tools for cleaning up your image. Which one you pick depends on the size and complexity of the area you need to fix:
- Spot Healing Brush — best for small blemishes, dust spots, and tiny imperfections. Just brush over the area; Photoshop samples the surrounding pixels automatically.
- Healing Brush — gives you manual control. Hold
Altand click to sample a clean area, then paint over the unwanted element. Good for wrinkles, scars, or small objects. - Clone Stamp — copies pixels exactly from one area to another. Use it for larger objects or when you need to preserve texture precisely (e.g., cloning a patch of grass over a rock).
For a more complex scenario — window reflections — a multi‑layer approach works better (see the Common Problems section below).
Always work on a duplicate layer when using the Spot Healing Brush or Clone Stamp. If the result looks wrong, you can delete the layer and try again without affecting the original.
Step 5 — Prepare for Export
Before exporting, consider these two final steps:
- Stamp Visible — press
Cmd+Shift+Alt+E(Mac) orCtrl+Alt+Shift+E(PC) to merge all visible layers into a single new layer while preserving the originals below. This gives you a flattened version for export without discarding your edit history. - Layer Comps — save different editing stages via Window → Layer Comps. This lets you compare versions and avoid over‑editing. As noted by editing professionals, Layer Comps are especially valuable when you’re experimenting with colour grades or crop variations.
Export as JPEG for web and social media, TIFF or PSD for print or further editing.
Solve Two Common Photo Problems That Beginners Face
Even after following a solid workflow, certain issues trip up almost everyone. Here are fixes for two of the most frequent frustrations, drawn from real user questions on Photoshop forums.
Colours Look Wrong When Printed
A photo that looks perfectly vibrant on your monitor can turn out overly intense or muddy on glossy photo paper. This happens because screens use RGB (Red‑Green‑Blue) while most commercial printers use CMYK (Cyan‑Magenta‑Yellow‑Black).
What to do:
- For professional printing (magazines, photobooks, fine‑art prints): convert the image mode via Image → Mode → CMYK Color. This shifts the colour gamut to match what the printer can reproduce.
- For home or office printers: many modern printers accept RGB and convert internally, so CMYK conversion isn’t always necessary. Check your printer driver settings — look for “Photo” or “Best” quality.
- If only one colour is too intense (e.g., reds bleed): selectively desaturate that colour range. Add a Hue/Saturation Adjustment Layer, choose Reds from the drop‑down, and lower the Saturation slightly. This avoids dulling the whole image.
Quick test: Before printing a batch, make one test print on the same paper type you intend to use. Adjust saturation or brightness based on that print, not on what you see on screen.
Remove Window Reflections from Photos
Reflections on glass are tricky because they overlay both the subject and the background. A simple healing brush often fails because it blends unwanted colours into the image. The method shared by experienced community members uses a combination of selection, masking, and colour adjustment:
- Use the Pen Tool to draw a precise selection around the reflective surface (e.g., the window pane).
- Create a new layer and fill the selection with white. Name this layer “White Template.”
- Add a new image layer above it — this will hold the content that replaces the reflection. Set it as a clipping mask (right‑click the layer and choose “Create Clipping Mask”) so it only shows within the selected area.
- Add a Solid Color adjustment layer (choose a bluish‑white tone) and clip it to the new image layer.
- Lower the Opacity of the adjustment layer until the reflection is neutralised while the underlying detail reads naturally.
This approach preserves the original image structure and can be fine‑tuned by adjusting the opacity or swapping the solid colour for a gradient that matches the ambient light.
Use Advanced Techniques for Pro‑Quality Results
Once you’re comfortable with the basic workflow, these three techniques — drawn from professional editing practice — will take your retouching to the next level.
Dodge and Burn for Portrait Retouching
Dodging (lightening) and burning (darkening) selectively shapes the light in your image. Instead of using the traditional tools directly on the image, create a dedicated layer:
- Add a new layer, set its blend mode to Overlay, and fill it with 50% gray (Edit → Fill, choose 50% Gray).
- Select the Brush Tool with a soft round brush. Set Exposure to between 6% and 12% and Range to Midtones.
- Paint with white to dodge (lighten) and black to burn (darken). The effect is subtle because of the low exposure — build it up gradually.
If you overdo it: simply reduce the Opacity of the 50% gray layer. This dials back the entire dodge‑and‑burn effect at once.
Speed Up Editing with Layer Mask Duplication
After spending time creating a detailed layer mask on one adjustment layer, you don’t need to redo it for another. Hold Option (Mac) or Ctrl (PC), click the mask thumbnail, and drag it onto a different adjustment layer. Photoshop copies the mask instantly. This is especially useful when you want the same selective adjustment — for example, brightening only the subject’s face — applied to both a Curves layer and a Hue/Saturation layer.
Prevent Over‑Editing with Layer Comps and Stamp Visible
It’s easy to push an edit too far and then struggle to remember what the previous stage looked like. Layer Comps (Window → Layer Comps) let you save snapshots of your Layers panel state — visibility, position, and layer styles. Click the “New Layer Comp” icon, give it a name (e.g., “Warm grade – before burn”), and continue editing. You can switch between comps to compare versions or revert to an earlier stage.
Combine this with Stamp Visible (keyboard shortcut Cmd+Shift+Alt+E) to create a flattened snapshot on a new layer at any point. If you later decide you prefer the “before,” you can hide your adjustment layers and keep the stamped layer as your final output.
Select the Right Tool — Photoshop vs Free Alternatives vs Mobile
Photoshop is the industry standard, but it’s not the only option. Based on community discussions about alternatives, here’s how to decide which tool fits your situation.
When to Use Adobe Photoshop
Choose Photoshop when you need full layer‑based editing, precise masking, advanced retouching (Dodge & Burn, frequency separation), and compatibility with professional print workflows. The Photography Plan (Photoshop + Lightroom) costs $9.99/month as of 2026, making it accessible for serious hobbyists and professionals alike. It runs on Windows and macOS — there is no native Linux version.
Best Free Options
- GIMP — the most feature‑rich free desktop editor. Supports layers, masks, and many of the same retouching tools. Available on Windows, macOS, and Linux.
- Fotor — browser‑based, with a Pro tier at $3.33/month. Good for quick enhancements without installing software.
- Pixlr — offers four free editions including a mobile app. Works in the browser and supports layers.
- Photoshop Express — Adobe’s free mobile app for quick crops, filters, and basic adjustments.
- Photo Editor by Aviary — a straightforward mobile app for casual edits.
Mobile‑First Editing
Yes, you can edit photos on your phone without losing quality. Apps like Snapseed (free), Lightroom Mobile (free tier available), and Photoshop Express offer selective adjustments, healing tools, and presets. For quick social‑media edits, mobile tools often take less than a minute per image.
Comparison Table — Photoshop vs Top Free and Paid Alternatives
| Tool | Platform | Price | Best For | Notable Limitation |
|---|---|---|---|---|
| Photoshop CC | Windows, macOS | $9.99/month | Professional retouching, compositing, print prep | Subscription required; no Linux support |
| GIMP | Windows, macOS, Linux | Free | Full layer editing on a budget | Interface less polished; fewer one‑click tools |
| Fotor | Browser, iOS, Android | Free / Pro $3.33/month | Quick online edits, HDR effects | Advanced masking limited |
| Pixlr | Browser, iOS, Android | Free (four editions) | Browser‑based layer editing | Slower with large files |
| Photoshop Express | iOS, Android | Free | Mobile touch‑up and filters | No layers; limited retouching |
| Snappa | Browser | Free / Pro from $10/month | Social media graphics with 20,000+ stock photos | Not a full photo editor; no layers |
| Pixelz | Online service | $1.45/image | Professional background removal | Per‑image cost adds up |
| Mister Clipping | Online service | $0.99/image | Hand‑made clipping paths | Not self‑service; turnaround time |
Which Approach Should You Use?
As one beginner put it in a help forum, “being a newbie I thought we could only do the edit and not a tutorial” — meaning most people just want a clean result without a complex workflow. The right approach depends on your time, tools, and goal.
- If you have only 2 minutes: Crop, auto‑tone (Image → Auto Tone), and export. Skip layers and adjustments. The Quick Reference table gives you the essential steps.
- If you have 30 minutes and want full control: Follow the Complete Photo Editing Workflow (Step‑1 through Step‑5). Use Adjustment Layers, the Clone Stamp, and Stamp Visible.
- If you are on a tight budget: Try GIMP or Photopea (browser‑based, supports PSD files). Both handle layers and masks without a subscription.
- If you need to edit on the go: Use Photoshop Express or Lightroom Mobile. For quick social‑media posts, mobile apps are often sufficient.
- If you encounter a specific problem like window reflections or colour printing issues: jump to the Common Problems section for targeted fixes.
Before you open Photoshop, take a moment to prepare. Digital Photography School compares this to a chef preparing ingredients or an author outlining a chapter — a short planning step prevents frustration. Ask yourself five questions:
- What’s the output? (Web, print, social media, or a client deliverable?)
- What’s the one thing I want to fix most? (Exposure, colour cast, a distracting object?)
- Do I need to remove anything? (Blemishes, reflections, background clutter?)
- What mood or colour palette am I going for? (Warm, cool, high‑contrast, muted?)
- How much time do I have? (2 minutes, 15 minutes, an hour?)
As one photography educator puts it: “Editing beautiful images is a craft… it’s the final step for you to infuse your images with your personality and style.” Having a plan — even a short one — lets you focus on that craft instead of wandering through menus.
Related guides on this site: How to crop in Photoshop (7 ways) · How to export from Photoshop · How much does Photoshop cost in 2026 · Photoshop vs Lightroom — which should you use?