
- Category:
- Workflow Tips
- Summary:
- The most common use case for the Magic Wand is stripping a solid-colour background away from a subject. Here is a repeatable workflow
⏱️ The essentials
The Magic Wand tool** selects pixels by tone and colour rather than by tracing edges. It is grouped with the Quick Selection tool in the toolbar.
Shortcut: W
Location: Click & hold the Quick Selection icon (or right-click) to reveal the Magic Wand
Tolerance range: 0–255 (integer only)
Best for: solid-colour backgrounds, large uniform areas
For a full walkthrough, jump to the step-by-step guide or the troubleshooting section.
- Tool Location & Settings
- How It Works & Step-by-Step
- Common Problems & Fixes
- Advanced Techniques
- Choosing the Right Tool
Tool Location and Basic Settings
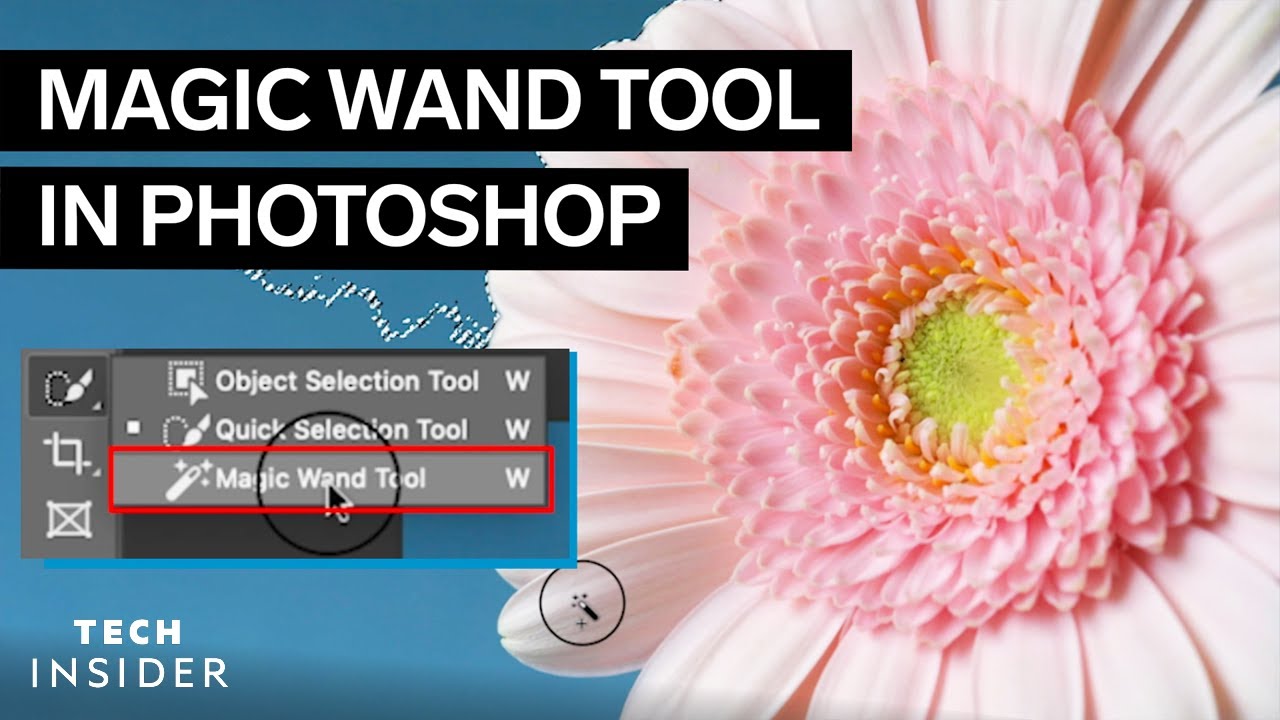
The Magic Wand tool lives behind the Quick Selection tool in the vertical toolbar. Click and hold the Quick Selection icon (or right-click it), then select Magic Wand Tool from the fly‑out menu. The default keyboard shortcut is W — pressing W activates whichever tool is currently top of that group; you can cycle through the group with Shift+W.
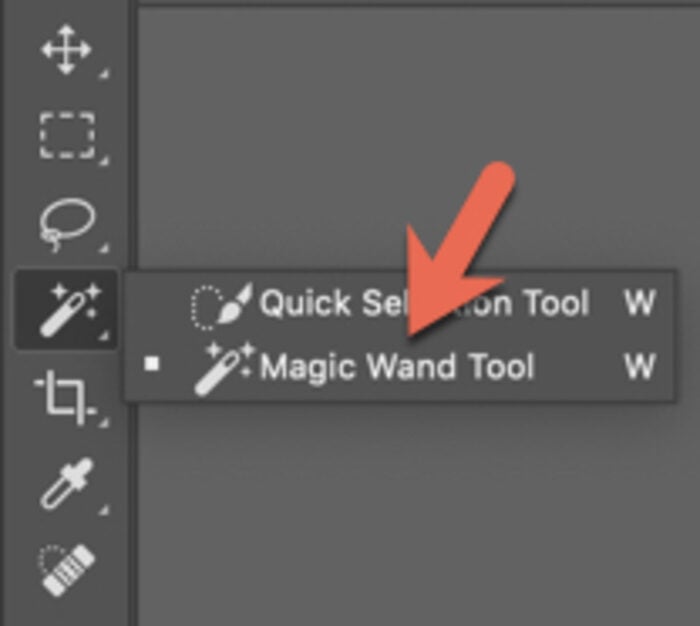
The Magic Wand tool is grouped behind the Quick Selection tool in the toolbar. A red arrow highlights its entry in the fly‑out menu.
An alternate view of the toolbar fly‑out, showing the Magic Wand tool selected.
Once the tool is active, the Options Bar across the top of the canvas displays a set of controls that govern how the wand behaves. The table below summarises each setting.
-
Selection mode — New, Add, Subtract, Intersect — the four icons on the far left. New replaces any existing selection; Add (or hold
Shift) expands it; Subtract (or holdAlt/Option) removes areas; Intersect keeps only the overlapping portion. -
Tolerance — An integer from 0 to 255 that controls the colour range the wand selects. A value of 32 is a common starting point for average images; higher values (e.g. 80–100) select broader ranges, while lower values (10–20) restrict the selection to very similar tones.
-
Anti-alias — When checked, the selection edges are smoothed so they blend naturally into the background — important for keeping results from looking jagged.
-
Contiguous — Checked by default. It limits the selection to adjacent pixels of the chosen colour. Uncheck it to select every pixel of that colour across the entire image — useful for selecting scattered elements of the same hue.
-
Sample All Layers — When checked, the wand samples colour data from every visible layer, not just the active layer. Essential when you need to select an area based on the composite image rather than a single layer.
Settings overview based on Adobe's official Magic Wand documentation and the BYOL tutorial.
How the Magic Wand Tool Works and How to Use It
The Magic Wand selects pixels based on tone and colour rather than shape or edge contrast. When you click a pixel, the tool samples its colour and, using the Tolerance value you set, identifies every pixel within that colour range. With Contiguous on, only connected pixels are selected; with it off, all matching pixels across the whole layer are included.
A successful Magic Wand selection: the chameleon is isolated by clicking the orange background and then inverting the selection.
The tool is at its best when the area you want to select has a uniform, solid colour — a white backdrop, a blue sky, a monochrome shape. It struggles with subtle gradients, soft edges, and fine detail such as hair or fur. For those cases, the Quick Selection or Object Selection tools are more suitable.
Step-by-Step: Remove a Solid-Colour Background
The most common use case for the Magic Wand is stripping a solid-colour background away from a subject. Here is a repeatable workflow.
1
Open your image and select the Magic Wand tool by pressing W. If a different tool appears, press Shift+W or click and hold the toolbar icon to switch.
2
Click on the background — the area you want to remove. Start with a Tolerance of 32. The background should become surrounded by marching ants. If only part of it is selected, raise the Tolerance (try 50 or 70) and click again.
3
Add any missed areas by holding Shift (a small + sign appears next to the wand) and clicking the unselected spots. Alternatively, use the Add to Selection icon in the Options Bar before clicking.
4
Invert the selection so the subject is selected instead of the background: go to Select → Inverse or press Ctrl+Shift+I (Cmd+Shift+I on Mac).
5
Create a layer mask by clicking the Add Layer Mask icon at the bottom of the Layers panel (a rectangle with a circle inside). The background disappears, leaving the subject isolated on a transparent background.

A pink-flower subject on a solid-colour background — an ideal scenario for the Magic Wand workflow.
💡 Pro tip
After masking, you can use Generative AI (Photoshop's generative fill) directly on the selected area while the mask protects the rest of the image. This is an efficient way to replace or modify the background without manual cloning.
Shift-click and layer mask procedure documented in the Photoshop Gurus forum and the BYOL step-by-step guide.
Common Magic Wand Problems and How to Fix Them
Even experienced users run into issues where the wand seems to misbehave. Below are the four most frequently reported problems and the steps to resolve them.
Magic Wand Selects the Entire Layer
If clicking with the wand selects the whole layer instead of a specific colour area, the most likely cause is corrupted tool settings or preferences. Try these two fixes in order:
- Reset the tool: click the downward‑pointing arrow (or gear icon) in the far‑left corner of the Options Bar and choose Reset Tool.
- Reset Photoshop preferences: hold
Ctrl+Alt+Shift(Windows) orCmd+Option+Shift(Mac) while launching Photoshop. Confirm the reset dialog. (Your saved workspaces and custom shortcuts will be restored from backup; it is wise to export them first.)
Issue reported in the Adobe Community forum; reset procedure confirmed by the same thread.
Magic Wand Selects the Border Instead of the Interior
This puzzling behaviour — the wand picks out the outline of a shape rather than its fill — is typically caused by the Eyedropper tool's sample size. The Magic Wand borrows the Eyedropper's Sample Size setting. If it is set to a wide average (e.g. 51 × 51), the wand samples a blended colour rather than the exact pixel you clicked.
- Fix: temporarily switch to the Eyedropper tool (shortcut
I), go to the Options Bar, and set Sample Size to Point Sample. Switch back to the Magic Wand — the border‑selection problem should be gone.
Root cause identified by a Reddit user in this thread; the Eyedropper dependency is not documented in official Adobe help.
A partial or border‑only selection (left edge of the flower) is often a symptom of the Eyedropper sample size being set to a wide average rather than Point Sample.
Tolerance Value Error (Integer Between 0 and 255)
Photoshop enforces a strict integer range for Tolerance. If you type a decimal, a letter, or a number outside 0–255, the application shows the dialog "An integer between 0 and 255 is required."
Fix: enter a whole number — 10, 32, 50, 80 — whatever suits your image. The default is 32; values above 100 are rarely needed unless the image is extremely low‑contrast.
Error message documented in the Adobe Community forum.
Magic Wand "Not Working" After an Update
The Magic Wand has not been removed or deprecated in recent versions (2024, 2025). It is simply hidden behind the Quick Selection tool. If you cannot find it:
- Click and hold the Quick Selection icon in the toolbar, then choose Magic Wand Tool from the fly‑out.
- Or press
Wand thenShift+Wto cycle through the grouped tools until the Magic Wand is active.
Tool location confirmed by BYOL and Pathedits; version continuity noted by Pathedits.
Advanced Magic Wand Techniques for Better Selections
Once you are comfortable with the basics, these three advanced workflows give you noticeably cleaner results — especially when the wand alone leaves rough or incomplete edges.
Using Magic Wand on a Layer Mask Directly
Rather than creating a selection and then a mask, you can apply the wand directly to an existing layer mask thumbnail. Click the mask thumbnail in the Layers panel to make it active (a white border appears around it), then use the Magic Wand to add or remove masked areas:
- Clicking a white area of the mask with the wand selects that region; you can then fill it with black (or remove it from the mask) to hide more of the layer.
- Clicking a black area lets you add white back to the mask, revealing portions of the layer.
This technique is non‑destructive — you never alter the original layer pixels — and it lets you fine‑tune a mask without starting over.
Workflow derivable from the masking discussion in Pathedits.
Refining Magic Wand Selections with Select & Mask
The Select & Mask workspace is designed to polish selections that are nearly right. After making a selection with the Magic Wand, click the Select & Mask button in the Options Bar. In the workspace you will find a set of Global Refinements sliders:
- Smooth — rounds out jagged selection edges. Start at 2–5 for small irregularities.
- Feather — softens the selection boundary by a pixel radius. 0.5–1 px is often enough to remove hard edges without losing detail.
- Contrast — sharpens the transition zone. A value of 10–20 usually restores crispness after feathering.
- Shift Edge — moves the selection boundary inward or outward. Negative values shrink the selection (useful for removing background halos).
Set the Output To dropdown to Layer Mask (or New Layer with Layer Mask) and click OK. The refined selection is applied instantly.
Select & Mask workflow referenced in the BYOL tutorial and expanded in Adobe's own documentation.
Using Eyedropper Sample Size to Tweak Magic Wand Behaviour
As noted in the troubleshooting section, the Magic Wand uses the Eyedropper tool's sample size to determine which colour it samples. This is an undocumented dependency, but it gives you a fine‑grained control lever:
-
Point Sample — the wand samples the exact colour of the pixel you click. Best for precise, narrow selections.
-
3 × 3, 5 × 5, 11 × 11, … — the wand averages the colour over that pixel area. A wider average makes the selection broader and more forgiving on textured surfaces.
If you are selecting a slightly mottled background (a painted wall, a sky with faint clouds), try setting the sample size to 5 × 5 or 11 × 11 before using the wand. You may need a slightly lower Tolerance to compensate, but the result often captures the area more uniformly.
Eyedropper dependency confirmed by Reddit user zythe84 and discussed in the Photoshop Gurus forum.
Choosing the Right Tool for Your Image
The Magic Wand is a specialist, not a generalist. It delivers its best results on solid-colour backgrounds, large uniform areas, and graphic elements with crisp edges. For complex subjects — hair, fur, transparent objects, intricate fabric — other selection methods are more reliable.
The table below compares the Magic Wand with the most common alternatives in Photoshop.
| Tool | Strongest Use Case | Limitations |
|---|---|---|
| Magic Wand | Colour‑based selection on solid backgrounds, large uniform colour areas | Fails on subtle gradients, soft shadows, and complex edges (hair, fur) |
| Quick Selection | Edge‑based selection with a brush; good for moderately detailed subjects | Sensitive to brush size; slower on large uniform areas; can bleed into similar‑coloured backgrounds | | Object Selection | AI‑powered one‑click subject isolation (people, animals, cars, products) | Requires a recent Photoshop version; results vary with composition and lighting | | Pen Tool | Precise vector paths for cut‑outs that need scalable edges | Manual tracing is time‑consuming; not practical for soft or irregular edges |
If you regularly extract subjects from solid backgrounds — product photography for e‑commerce, for example — a dedicated plugin like Layerbench can automate the mask‑creation and transparent‑PNG export steps. Layerbench calls Photoshop's own Select Subject, applies a mask, trims to the visible bounds, and exports lossless PNGs in one action. It also includes edge‑cleanup (minimum shrink radius of 1–3 px) to reduce halos, and a mask‑only mode that leaves the PSD editable for further refinement.
Comparison criteria informed by Pathedits (solid‑background recommendation) and the Photoshop Gurus forum (sensitivity vs. brush‑size distinction).
⚠️ When to switch away from Magic Wand
If the background contains a gradient, multiple similar colours, or if the subject has wispy edges (hair, fur, smoke), the Magic Wand will produce a ragged selection even with careful Tolerance adjustments. In those situations, the Quick Selection tool or Select & Mask with a brush refinement will give you a cleaner boundary — and the Pen Tool remains the gold standard for hard‑edge product silhouettes when you need a vector path.