- Category:
- Selection & Masking
- Summary:
- Learn how layer masks in Photoshop use black to hide and white to reveal for non-destructive editing, including four methods to add and edit masks.
The short answer A layer mask is a grayscale channel attached to any layer that lets you hide or reveal parts of the image without deleting a single pixel. Black hides, white reveals, gray = partial transparency. This mechanism has been stable since Photoshop v3 (1994).
The Black and White Rule That Controls What You See
A layer mask is essentially a grayscale image attached to a layer. Every pixel in the mask corresponds to a pixel in the layer, and the brightness of that mask pixel determines the opacity of the layer pixel at that location.
Black conceals. Where the mask is black, the layer becomes completely transparent and the content below shows through. White reveals. Where the mask is white, the layer stays fully opaque. Gray creates partial transparency. A 50 % gray mask pixel makes the layer 50 % transparent — the darker the gray, the more transparent; the lighter the gray, the more opaque. This is the single rule that governs every layer mask in Photoshop, and it has remained unchanged since Photoshop Essentials notes that layers and masks were introduced in version 3 (1994).
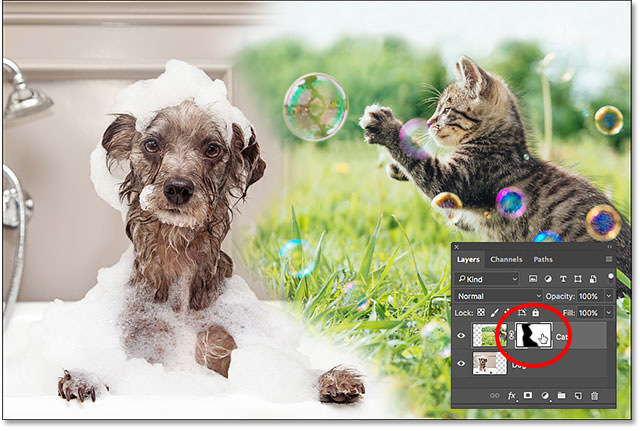
The black area on a mask hides the layer, the white area reveals it. Gray creates partial transparency.
This non-destructive mechanism is what separates layer masks from the Eraser Tool. Digital Photography School explains that the Eraser permanently deletes pixels, while a mask simply hides them — you can always paint back what you hid by switching from black to white.
Adding a Layer Mask — Four Methods You Should Know
You can add a mask in several ways depending on what you start with. The official Adobe Help page documents all four approaches below.
From the Layers Panel
Select the layer you want to mask, then click the Add Layer Mask icon at the bottom of the Layers panel — it looks like a rectangle with a circle inside. A white mask thumbnail appears next to the layer thumbnail.
From the Menu
With the target layer selected, go to Layer > Layer Mask > Reveal All (white mask) or Hide All (black mask). This is useful when you want to start from a fully hidden layer and paint the visible areas.
From an Active Selection
Make a selection with any selection tool, then click the mask icon. Everything inside the selection stays visible (white), everything outside becomes hidden (black). To reverse this — hiding the selection and revealing the rest — Alt-click (Win) / Option-click (Mac) the mask icon.
From Transparency
If your layer already has transparent areas (e.g. a PNG with a transparent background), choose Layer > Layer Mask > From Transparency. Photoshop converts the existing transparency into a mask, keeping the opaque areas white and the transparent areas black.

Click the rectangle-with-circle icon to add a mask to the selected layer.
Editing and Viewing Your Mask — What Most Tutorials Skip
Adding the mask is only the start. The real work happens when you edit it, and knowing how to inspect what your mask actually looks like saves a lot of guessing.
Painting Black and White
Select the mask thumbnail in the Layers panel — a white border appears around it, meaning the mask is active. Grab the Brush tool, set the foreground colour to black (to hide) or white (to reveal), and paint on the image. The changes appear live on the mask thumbnail. Digital Photography School recommends starting with a soft-edged brush at 30–50 % opacity for gradual transitions.
Viewing the Mask as Grayscale
Alt-click (Win) / Option-click (Mac) the mask thumbnail. The document window switches to display the mask as a full-screen grayscale image — black, white, and all the grays in between. This view makes it easy to spot gaps, noise, or soft edges that would be invisible when the mask is overlaid on the layer. Click the thumbnail again to return to the composite view. Photoshop Essentials calls this one of the most underused inspection tools.
Moving and Duplicating Masks
To move a mask to another layer, drag its thumbnail to the target layer. To duplicate a mask, Alt-drag (Win) / Option-drag (Mac) the thumbnail to another layer — the original stays in place and a copy appears on the target. Both procedures are documented in Adobe's official guide.
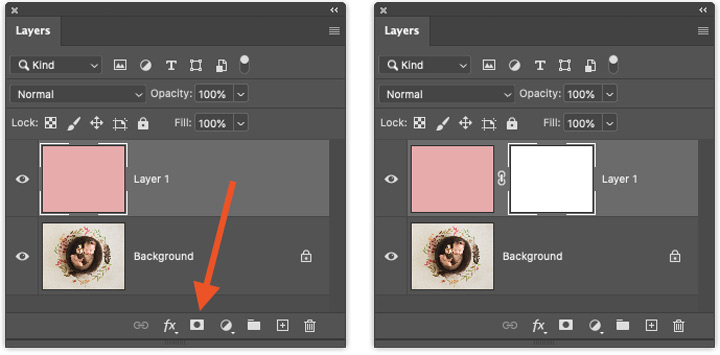
Always make sure the mask thumbnail (white border) is selected before painting.
Common Layer Mask Problems and How to Fix Them
Layer masks generally work reliably, but real-world users have reported two specific issues that can derail a project. Both are documented in the Adobe Community forums.
Random Mask Distortion (Bug in PS 24.3 and Older)
Users on both older and newer PCs have reported that masks become randomly distorted every 2–3 hours of continuous work — parts of the mask stretch, shift, or show blocky artefacts. The issue appears to affect Photoshop 24.3 and earlier versions. According to the Adobe Community bug report, no permanent workaround exists beyond updating to a newer version of Photoshop. The glitch is triggered intermittently and is not hardware-specific.
Edge Artifacts After "Select and Mask"
When you use Select and Mask to refine a selection, the Decontaminate Colors checkbox can produce coloured fringing or halo artefacts along the edge of the mask. The fix is straightforward: as the Adobe Community issue explains, uncheck Decontaminate Colors entirely. Then create a new layer clipped to the masked layer, set its blend mode to Color, and use a soft brush to paint out any remaining fringing manually. This workflow keeps the mask clean and non-destructive.
⚠️ Common beginner mistake If your brush strokes don't seem to affect the mask at all, check that the mask thumbnail (not the layer thumbnail) has the white selection border. Painting on the layer instead of the mask is the most frequent error reported by new users.
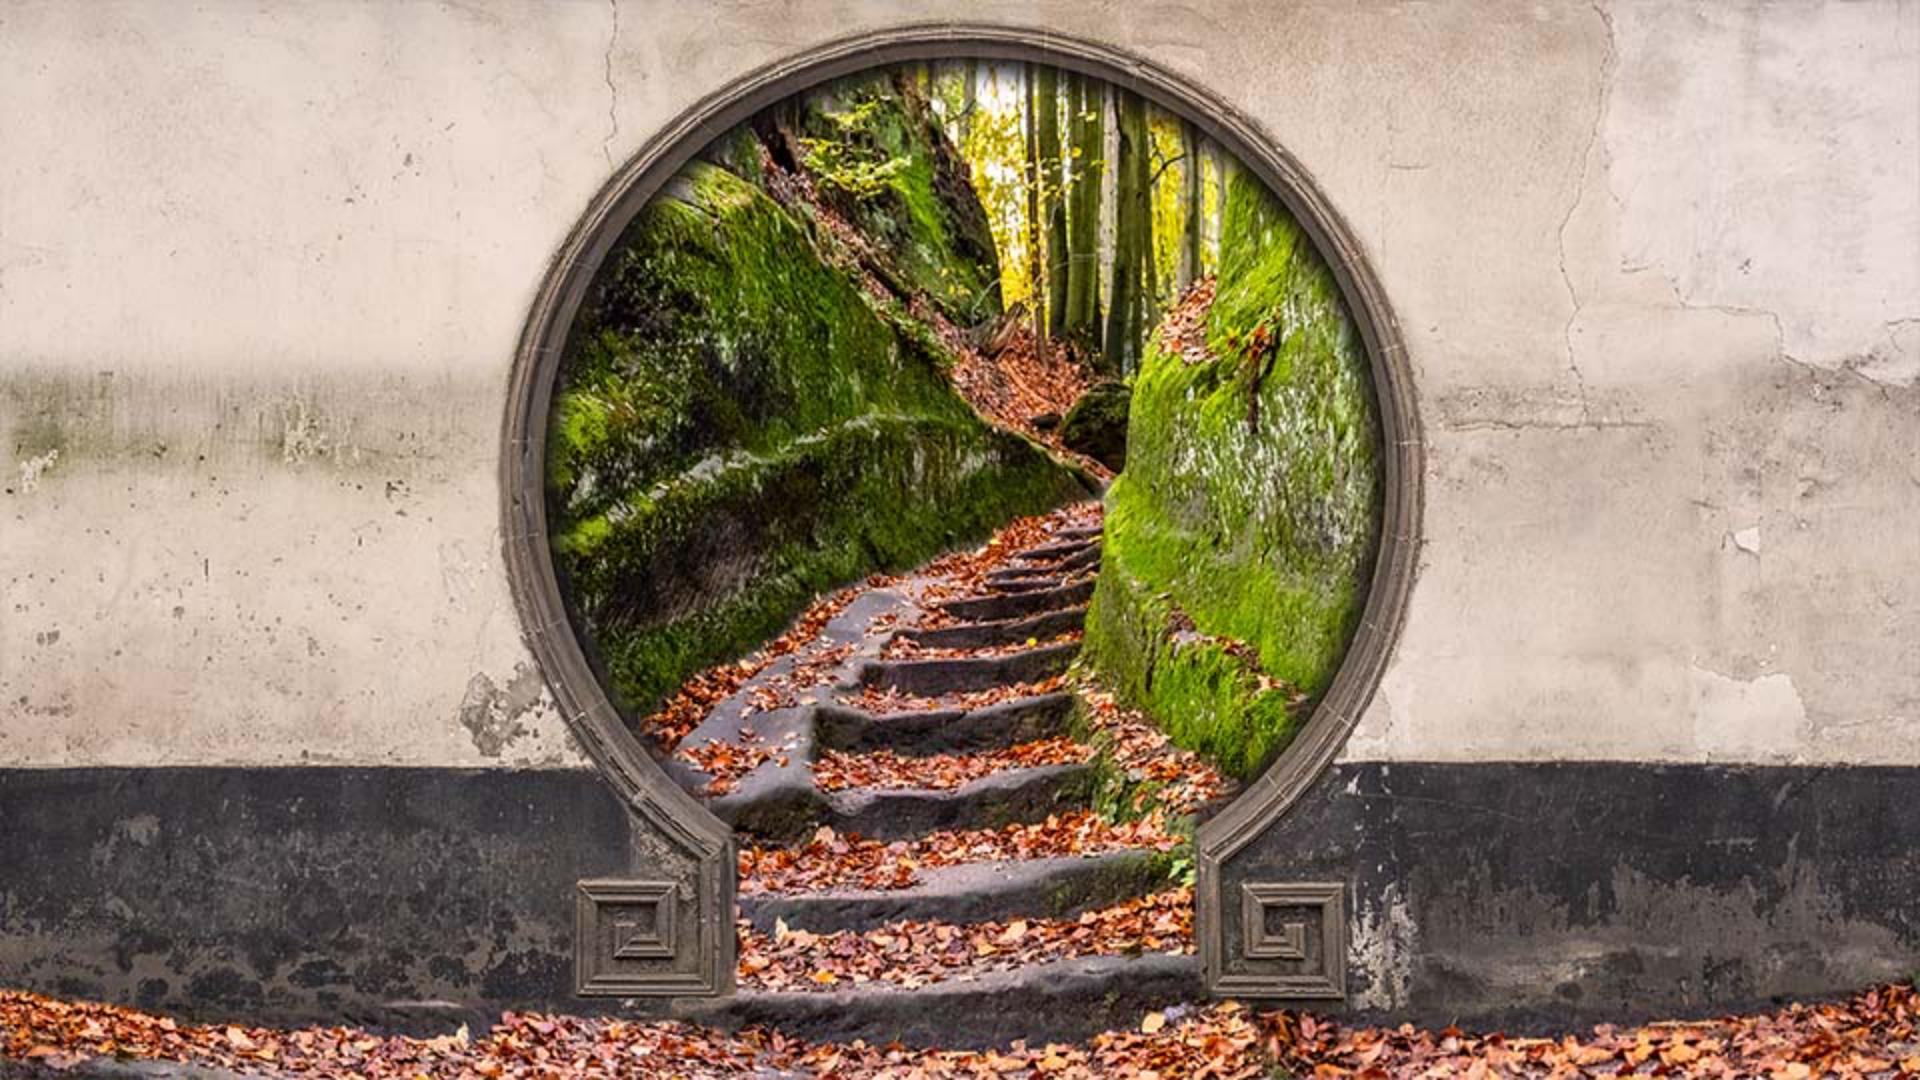
Edge artifacts can appear after Select and Mask; the fix is to uncheck Decontaminate Colors and manually clean the edge.
Advanced Masking Techniques for Hair, Smoke, and Complex Edges
Once you're comfortable with basic black-and-white painting, you can handle nearly any subject. But fine hair, translucent smoke, or busy backgrounds call for more specialised techniques. The three methods below are widely used by professionals.
Channel-Based Masking with Calculations
When a subject has fine hair against a high-contrast background, the Channels panel often contains one channel (usually red, green, or blue) that already separates the hair from the background. Open the Channels panel, find the channel with the strongest contrast, duplicate it, then use Image > Calculations to blend that channel with itself in the Screen or Multiply blend mode. The result is a refined mask that preserves individual strands of hair. A detailed walkthrough on YouTube shows how Calculations can turn a seemingly impossible selection into a clean mask.
Luminosity Masks for Blending
Luminosity masks are created from the image's own brightness values — highlights, midtones, and shadows — rather than from colour channels or manual painting. They allow you to make tonal adjustments or blend multiple exposures with smooth, natural transitions. ProEDU's guide to luminosity masking demonstrates how to load the RGB channel as a selection, save it as an alpha channel, and use that as a mask for curves or levels adjustments.
Refining Mask Edges
After you have a basic mask, the Select and Mask workspace offers edge refinement tools that work on masks as well as selections. Set Feather to 0.5–1 px, Shift Edge to −5 % to −10 % (to pull the edge inward slightly and reduce background halos), and use the Refine Edge Brush to paint over problem areas like flyaway hair. A focused tutorial on YouTube covers five specific settings that produce cleaner mask edges without starting over.
For repetitive cutout and export tasks — such as processing a batch of product photos — a dedicated plugin like Layerbench can automate subject selection, mask creation, and transparent PNG export in a single action, which can save time when you need to move through many images quickly.
Which Masking Method Should You Use? A Quick Decision Framework
Different subjects and workflows call for different masking approaches. The table below maps your situation to the most efficient technique.
| If your subject is… | Use this method | Why it works |
|---|---|---|
| A simple object on a solid background | Basic layer mask + Brush tool | Quick, non-destructive; easy to paint black/white with a soft brush (Source). |
| Hair, fur, or fine details against a busy background | Channel-based masking with Calculations | Uses the image's own contrast to preserve individual strands (YouTube walkthrough). |
| Exposure blending or precise tonal adjustments | Luminosity masks | Creates masks from brightness values for smooth, natural transitions (ProEDU guide). |
| A mask that needs cleaner edges | Edge refinement in Select and Mask | Feather, Shift Edge, and Refine Edge Brush fix halos and jagged borders (5-edge tips video). |
| Halos or fringing after Select and Mask | Uncheck Decontaminate Colors + Color blend mode fix | Removes coloured fringing without damaging the mask (Adobe Community fix). |
And if you're still reaching for the Eraser Tool? Replace it with a layer mask. The Eraser permanently deletes pixels, which makes it impossible to recover hidden areas later. A layer mask hides them instead — you can always paint back what you need. Digital Photography School's beginner guide frames this as the single most important habit shift for anyone learning Photoshop.
- 🎯 Solid background — Basic layer mask + Brush. Fast, no special setup.
- 🌀 Hair / fur — Channel masking with Calculations. Preserves fine strands.
- ☀️ Exposure blends — Luminosity masks from brightness values. Smooth transitions.
- ✨ Fringing / halos — Uncheck Decontaminate Colors; paint with Color blend mode.