- Category:
- Background Removal
- Summary:
- Photoshop hair background removal: 4 methods (Select & Mask, Background Eraser, Channels, manual painting) with steps to fix white halos & chopped transparency.
What you need to know
Four methods work for hair background removal in Photoshop, each suited to different images. Use Select & Mask with the Refine Edge Brush for fast results on high-contrast solid backgrounds. The Background Eraser Tool handles uniform colour backgrounds reliably. The Channels method extracts fine hair from complex scenes where colour contrast exists. Manual painting with custom brushes is the last resort for low-contrast or wispy hair when automated tools lose too much detail. Each method below includes step-by-step instructions, exact settings, and fixes for common failures like white halos and chopped transparency.
What you need before you start
Hair background removal in Photoshop demands a few prerequisites. Having these in place saves time and prevents destructive mistakes.
Photoshop version matters
Select & Mask (the modern Refine Edge workspace) was introduced in Photoshop CC 2015.5 and is available in all later versions including the 2024 release referenced in recent tutorials. If you are using CS3 through CS6, Select & Mask is not available — fall back to the Background Eraser Tool or the Channels method, both of which work in every version including Photoshop Elements. The Background Eraser Tool has been part of Photoshop since version 7 and is present in all subsequent releases.
Layer masking basics
Always work with a layer mask, never erase directly on the original pixel layer. Duplicate the background layer first (Ctrl+J / Cmd+J) so you have an untouched backup. A layer mask hides parts of the image without deleting them, letting you refine the edge later.
Tool familiarity
You should be comfortable with the Layers panel, the Channels panel, the Brush Tool, and basic selection tools. The four methods below range from beginner-friendly (Select & Mask) to advanced (Channels method, manual painting).
Tip If you are new to layer masks, spend five minutes practising: add a black mask to a layer, paint white to reveal, paint black to hide. This single skill underpins every method in this article.
Photoshop CC 2015.5+ Background Eraser: all versions Channels: all versions
Use Select and Mask with the Refine Edge Brush
Adobe’s recommended modern workflow for hair. It works fastest on images where the hair has good contrast against the background — think a model against a white or green screen. See Adobe's official guides on refining a selection with Select and Mask and the one-click Remove Background quick action for the underlying tools.
Run Select > Subject then open Select and Mask
- Open your image and duplicate the background layer.
- Choose Select > Subject (Photoshop CC 2015.5+) — this uses AI to make an initial selection.
- Click the Select and Mask button in the Options bar (or go to Select > Select and Mask).
- Grab the Quick Selection Tool from the left toolbar and brush over any areas the AI missed.
- In the Properties panel, adjust Edge Detection — a radius of 1–3 px is typical for hair. Enable Smart Radius.
- Switch to the Refine Edge Brush (the paintbrush icon with a feather) and brush directly over hair edges. Photoshop analyses the edge and recovers fine strands.
- Under Output Settings, choose Output to: Layer Mask and click OK.
Check Decontaminate Colors — only on high-contrast backgrounds
In the Select and Mask workspace, the Decontaminate Colors checkbox under Output Settings removes colour fringing by replacing background colour pixels with nearby foreground colours. On a high-contrast image (white or green screen), one Reddit user reported it fixed my issue in a few clicks. However, on fine or fuzzy hair the same option can cause weird color pixelation on skin and chops away parts that shouldn't be transparent — as noted by another user in that same discussion. Use it selectively, and always preview before committing.
Common pitfall Decontaminate Colors is not a one-click fix for every image. On fine hair it introduces pixelation and destroys transparency. If you see jagged edges or missing strands after applying it, undo and switch to the Channels method instead.
When it works best
Solid, high-contrast backgrounds; medium-to-high contrast hair; images where the subject is already well separated from the background by colour. Avoid this method on wispy, flyaway hair or images where the hair tone is close to the background tone.
Works best: high contrast Avoid: fine/fuzzy hair
Remove Background with the Background Eraser Tool
A manual, brush-based method that works well on uniform solid-colour backgrounds. A detailed tutorial on pathedits.com demonstrates this approach for curly hair.
Step-by-step procedure
- Duplicate the background layer so you have a fallback.
- Create a high-contrast coloured layer (e.g. bright pink or neon green) between the original and the duplicate. This makes it obvious where the background has been erased.
- Select the Background Eraser Tool (it may be nested under the standard Eraser Tool in the toolbar).
- Sample the background colour using the Eyedropper or the tool’s built-in sampler.
- In the Options bar, set these values:
- Limits: Contiguous (prevents erasing into areas surrounded by hair)
- Sampling: Once (samples the colour you click, then erases only that colour)
- Brush hardness: 15% or softer (softer edges blend better with hair)
- Tolerance: start at 50%
- Check Protect Foreground Color — this prevents the tool from erasing colours you have defined as foreground.
- Begin erasing around the hair. Move the brush along the edge, not across it.
- Lower Tolerance to 20% near areas where the background colour is close to the hair colour (e.g. blue clothing against a blue background) to avoid accidentally erasing the subject.
Troubleshooting: when the tool eats into the hair
If the Background Eraser is removing hair strands instead of background, reduce the Tolerance value or switch Limits from Contiguous to Discontiguous (though Discontiguous is riskier). Also verify that the sampled background colour is accurate — re-sample frequently as you move around the image.
Best for
Uniform, solid-colour backgrounds; curly hair where the background is a single consistent colour; users working in older Photoshop versions (CS3–CS6) who do not have access to Select & Mask.
Tip The bright pink layer trick makes invisible erasing visible. Keep it active until you are completely finished — it reveals even tiny missed spots that would be invisible on the original background.
Cut Out Hair with the Channels Method
The professional’s choice for complex backgrounds. By working with luminance contrast in the Channels panel, this method can separate hair from textures and colour blends that defeat automated tools. A Reddit contributor known as retoucherizer shared a detailed workflow that produces clean masks even on challenging images.
Step-by-step procedure
- Path the subject outline using the Pen Tool or Quick Selection to get a rough contour around the body and main hair mass.
- Open the Channels panel (Window > Channels). Look at the Red, Green, and Blue channels individually and duplicate the one with the strongest hair–background contrast.
- Invert the channel if needed so the subject appears white and the background black (or vice versa — the goal is a clear separation).
- Press Ctrl+L / Cmd+L to open Levels. Drag the white point and black point inward until the hair edge sits as close to pure black/white as possible without losing detail. Aim for a clean edge.
- Refine the channel mask by painting with a brush set to Overlay blending mode. Overlay mode lets you lighten or darken the channel without destroying detail — paint white to brighten, black to darken. Focus on the hair edge.
- Ctrl+click / Cmd+click the channel thumbnail to load it as a selection. Return to the Layers panel, add a layer mask to your subject layer, then paint white onto the mask to restore any lost hair detail.
- Fix fringing: add a new layer set to Darken blend mode, clip it to the subject layer (Ctrl+Alt+G / Cmd+Option+G), and use the Clone Stamp to sample nearby hair colour and paint over light halos.
Why it works for busy backgrounds
The Channels method relies on luminance contrast — differences in brightness — rather than colour. This allows it to handle scenes where hair is tangled with leaves, grass, or patterned fabric, provided there is a tonal difference. The Photoshop Gurus forum documented a case where a user struggled with a horse’s mane against grass; Quick Selection, Refine Edge, and the Burn Tool all failed. A Channels approach, combined with manual cleanup, was the only way to isolate the fine hair.
If the channel lacks contrast
No single channel gives a clean separation? Combine two channels using Image > Calculations. For example, blending Red and Green with the Multiply blend mode can produce a composite channel with improved contrast. Use that as your working mask.
Watch out The Channels method is the most reliable for fine hair, but it fails when the hair and background share the same luminance — e.g. blonde hair against a beige wall. In that case, no channel provides enough separation, and manual painting becomes necessary.
Paint Hair Back In Manually for Perfect Edges
When every automated tool — Select & Mask, Background Eraser, even Channels — leaves gaps or destroys transparency, the last resort is painting hair by hand. This is the approach used by professional retouchers for high-end commercial work. It requires a pen tablet and patience.
When to use this method
Low-contrast images where the hair tone is nearly identical to the background; wispy, flyaway strands on an inconsistent background (e.g. a windy outdoor portrait); any scenario where the mask has lost so much detail that the subject looks artificial. As one experienced Reddit user put it, there is no shortcut for that final level of polish.
Step-by-step: custom brush and tablet workflow
- Sample a patch of hair from the original image using the Rectangular Marquee Tool, then go to Edit > Define Brush Preset. Name it something like “hair_strand” — this creates a custom brush from real hair.
- Set up brush dynamics in the Brush Settings panel (F5):
- Shape Dynamics: enable Size Jitter and Angle Jitter (both driven by pen pressure)
- Scattering: enable with a low count (1–2) to create random spacing
- Transfer: enable Opacity Jitter (pen pressure control)
- On a new layer above the masked subject, sample a colour from the original hair using the Eyedropper. Start painting short strokes along the mask edge. Keep opacity low (20–40%) and build up layers — this mimics natural hair translucency.
- Vary stroke direction, length, and colour by sampling different parts of the hair. Add a few flyaway strands that extend beyond the mask edge where the original photo had them.
- If you need hair falling over a new background colour, sample tones from the original photo and paint them on a layer set to Darken or Screen blending mode depending on the background lightness.
Pro tips from community professionals
Reddit user pixelstag — who calls hair cutouts the bane of my career — recommends: lots of randomness and pressure dropoff with a pen tablet. Then some more painting with new hairs on top of your original masked image. The key is that no two strokes should look identical; randomness is what makes painted hair look real.
Tip A pen tablet is nearly essential for this method. Mouse-drawn hair tends to look uniform and artificial. Even an entry-level tablet (e.g. Wacom Intuos or a drawing tablet from Huion) gives you the pressure sensitivity needed for natural-looking strands.
How to Check Your Mask (Quality Assurance)
A mask that looks perfect against its original background may reveal white halos, jagged edges, or missing strands when placed on a different background. Testing against multiple backgrounds is the only way to be sure.
Three-background test — recommended by Reddit users rslashplate and chatterwrack:
- Black background — reveals white fringing and leftover background pixels.
- White background — reveals dark fringing and transparency issues in light areas.
- 50% grey background — shows colour fringing (green or magenta edges) that is invisible on black or white.
Add a fourth test — bright green or blue — to catch any residual colour contamination that blends into natural tones.
Zoom and scroll at 200–400%
Set your zoom level to at least 200% and scroll slowly along every edge of the hair. Look for:
- White or light halos — a thin band of the original background colour clinging to the hair.
- Jagged “stair-step” outlines — indicate anti-aliasing or mask issues.
- Missing strands — gaps where flyaway hair was erased.
Fixing halos discovered during QA
If you spot white fringing during the three-background test, these fixes work:
- Color Range method: create a layer mask, then go to Select > Color Range, sample the pure white, adjust the fuzziness, and paint over the halo on the mask.
- Darken layer clone: add a new layer set to Darken blend mode, clip it to the subject, and use the Clone Stamp to sample nearby hair colour and paint over the halo.
- Layer > Matting > Defringe: a quick one-click option that works on mild halos. Set a radius of 1–2 px.
When to Avoid Each Method (Limitations and Boundaries)
No single technique works for every image. Understanding where each method breaks down saves hours of frustration. The table below summarises the boundaries.
| Method | Fails when … | Better alternatives |
|---|---|---|
| Select & Mask + Decontaminate | Hair is very fine, fuzzy, or low-contrast. Decontaminate introduces pixelation and chops transparency. | Channels method or manual painting. |
| Background Eraser Tool | Background is busy, gradient, or multi-coloured. The tool samples a single colour; complex backgrounds cause accidental erasing of hair. | Channels method (for colour-based separation) or manual painting. |
| Channels method | Hair and background share the same luminance (e.g. blonde on beige). No channel provides enough contrast. | Manual painting with custom brushes; or combine channels via Calculations. |
| Manual painting | You need to process a high volume of images quickly. It requires a pen tablet and significant skill. | For repetitive cutouts on similar backgrounds, consider a dedicated plugin like Layerbench (one-click cutout, mask-only mode, edge cleanup with shrink radius, lossless layer export). |
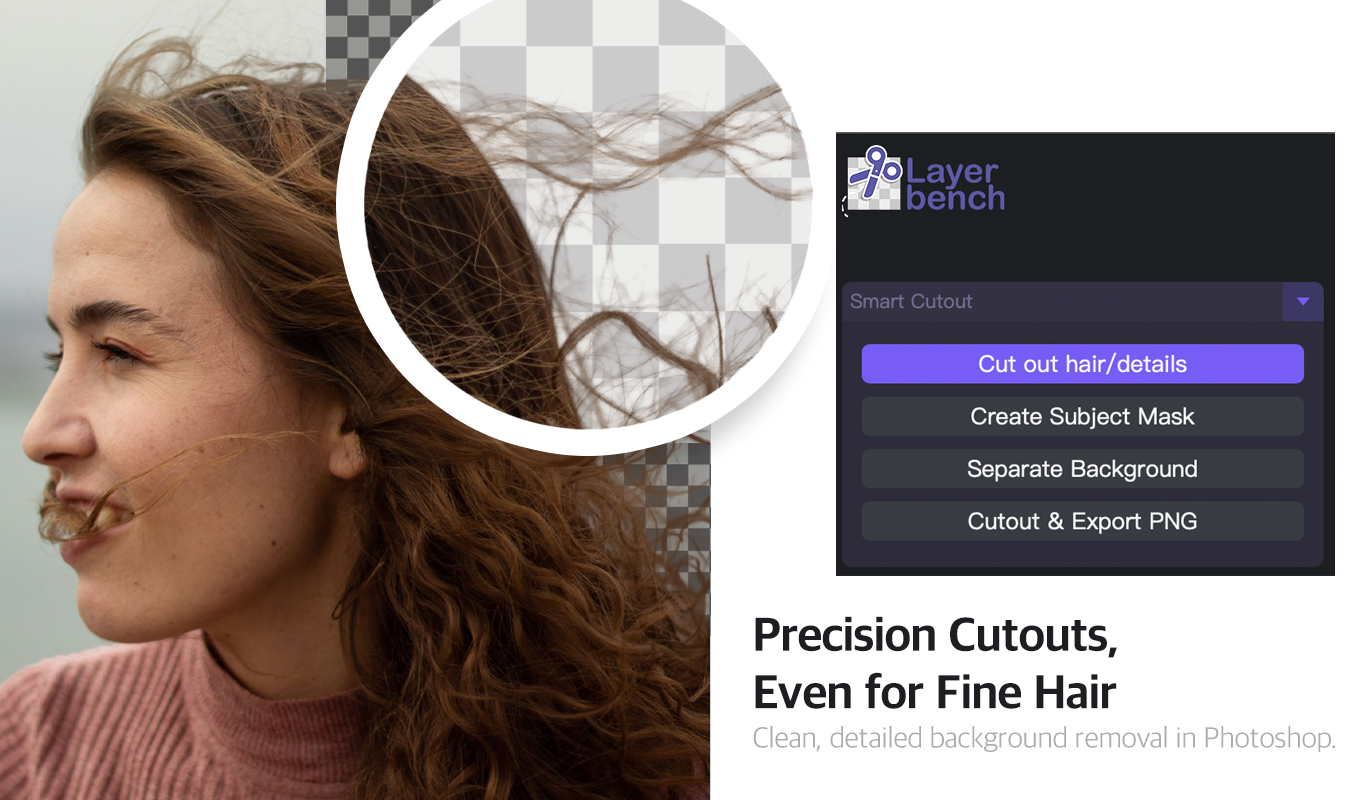
Layerbench — a separate Photoshop plugin: Smart Cutout keeps fine hair on transparency (Cut out hair/details, Create Subject Mask, Separate Background, Cutout & Export PNG).
Related: how to select hair in Photoshop · Select and Mask.
Version caveats
Select & Mask is available only in Photoshop CC 2015.5 and later. If you are using CS3, CS4, CS5, or CS6, the Background Eraser and Channels methods are your primary options — both work in all versions, including Photoshop Elements. The Background Eraser is also present in versions as early as Photoshop 7.
When you must combine methods
Many professional workflows use a hybrid approach: run Select > Subject for a rough mask, then switch to the Channels method to recover fine hair, and finish with manual painting for the last few strands. Do not feel constrained to a single method — the best results often come from layering techniques.
Important The methods described in this article exclude AI-based background removal (e.g. Photoshop’s Remove Background or Generative Fill). The community discussion that anchors much of this content explicitly requested non-AI workflows — the techniques above give you full control over every pixel.
All trademarks and product names referenced on this page belong to their respective owners. Method descriptions are based on community workflows and published tutorials, cited throughout.