- Category:
- Export & Automation
- Summary:
- Learn to batch export PNG in Photoshop using 5 proven methods—choose the fastest for large batches or the best for transparency and metadata.
⚡ The short answer: Use Actions + Save for Web (Legacy) for reliable batch PNG export. If you need speed at scale, switch to Image Processor Pro (free script) or a third-party converter like XnView after enabling Maximize Compatibility.
📂 Best for < 500 files: Actions + Save for Web
⚡ Best for 500+ files: Affinity Photo or GraphicsMagick
🔧 Fix for Bridge failures: enable Maximize Compatibility
Head-to-Head: Which Batch Export Method Fits Your Workflow?
Not all batch export methods are created equal. Some preserve metadata, others are dramatically faster. The table below compares every viable approach so you can pick the one that matches your file count, quality needs, and budget.
| Method | Speed | Transparency | Metadata | Custom Naming | 1000+ Files | Cost |
|---|---|---|---|---|---|---|
| Actions + Save for Web | Single-core; ~20 s/file on large PSDs | ✅ PNG-24 preserves alpha | ⚠️ Some metadata preserved | ❌ Hardcoded in action | ⚠️ Very slow at scale | Free (included) |
| Actions + Save As | Single-core; similar to SFW | ⚠️ May require merging layers | ✅ Preserves most metadata | ❌ Hardcoded | ⚠️ Slow; layer issues | Free (included) |
| Image Processor Pro | Single-core; moderate | ✅ PNG supported | ✅ Good preservation | ✅ Basic pattern support | ⚠️ Works but slow | Free script |
| Bridge Export Panel | Single-core; slower than actions | ⚠️ Fails ~90% without composite layer | ⚠️ Inconsistent | ✅ Preset-based | ❌ Unreliable | Free (included) |
| Bridge + PS Batch | Single-core; same as actions | ✅ Same as chosen action | ⚠️ Same as action | ❌ Action-dependent | ⚠️ Stable but slow | Free (included) |
| Custom Script (JSX) | Single-core; optimisable | ✅ Full control | ✅ Full control | ✅ Unlimited | ⚠️ Depends on code | Free (write yourself) |
| XnView / IrfanView | ⚡ Fast; multi-core | ⚠️ Needs composite layer | ⚠️ Varies by tool | ✅ Yes | ✅ Handles thousands | Free / Freemium |
| Affinity Photo | ⚡ Very fast (parallel) | ✅ Preserves alpha | ⚠️ Limited metadata | ✅ Yes | ✅ Excellent | Paid (trial available) |
Key takeaway: for one-off batches under 200 files, Actions + Save for Web is the most straightforward path. For production pipelines handling thousands of PSDs daily, a tool like Affinity Photo or GraphicsMagick (with Maximize Compatibility enabled) will save hours per week. Adobe Community users have documented the single-core bottleneck extensively.

Export options in the Photoshop File menu. Export As and Quick Export cannot be recorded in Actions — a key limitation confirmed by the Graphic Design Stack Exchange community.
Prepare Your PSD Files Before the Batch Runs
A few minutes of prep can prevent hours of failed exports. Two settings matter most: Maximize Compatibility and the document's colour mode.
Enable Maximize Compatibility — Why It Matters
The Bridge Export Panel and most third-party converters (XnView, IrfanView, GraphicsMagick) rely on the composite (flattened) layer embedded inside each PSD. Without it, Bridge throws an "unsupported file format" error on roughly 90% of assets, according to a detailed field report on Adobe Community.
🛠️ How to enable it
Go to Photoshop → Preferences → File Handling (macOS) or Edit → Preferences → File Handling (Windows). Set Maximize PSD and PSB File Compatibility to Always. This adds a composite preview layer, increasing file size by about 5–10% but ensuring every tool can read the flattened image.
Check Document Mode for Save As
If you plan to use Actions + Save As, the document must be in RGB colour mode, 8-bit depth, with no special channels (alpha channels are fine). Documents in CMYK, 16-bit, or 32-bit mode will not show PNG as an available format in the Save As dialog — a constraint noted by Graphic Design SE. Convert beforehand via Image → Mode → RGB Color and Image → Mode → 8 Bits/Channel.
Batch-Re-Save Existing PSDs (Workaround)
Already-saved PSDs that lack Maximize Compatibility can be fixed in bulk: record an action that opens a PSD, re-saves it (with Compatibility set to Always in the Save dialog), and closes it. Run that action on the folder before attempting the PNG export.
For a deeper look at saving PNGs from Photoshop, see our guide on saving PNGs in Photoshop.
Step-by-Step: Actions with Save for Web (Legacy)
This is the most reliable built-in method. It works in every recent version of Photoshop and handles transparency correctly with the PNG-24 preset.
Record the Action
- Open any representative PSD file.
- Open the Actions panel (Window → Actions or
Alt+F9). - Click the Create New Action button, name it (e.g., "Export PNG SFW"), and start recording.
- Go to File → Export → Save for Web (Legacy). In the dialog, choose PNG-24 from the preset dropdown and check Transparency.
- Click Save and choose a destination folder (this folder becomes hardcoded in the action).
- When the file closes, click Don't Save when prompted — this step is critical. If you skip it, the action will pause at the dialog.
- Stop recording.
💡 PNG-24 vs PNG-8
PNG-24 supports full 256-level alpha transparency (semi-opaque edges, soft shadows). PNG-8 only supports binary transparency (fully on or off). Always use PNG-24 for batch exports unless file size is the overriding concern.
Run the Batch
- Go to File → Automate → Batch.
- Set Source to the folder containing your PSDs. Choose Override Action 'Open' Commands (so the action opens each file automatically).
- Select your "Export PNG SFW" action.
- Set Destination to None (the destination is already baked into the action).
- Click OK and let Photoshop process the files.
⚠️ Known limitation: The destination folder is hardcoded. To send output to a different folder, you must create a new action or edit the existing one. This is the most common frustration reported in Adobe Community threads.

Batch conversion workflow — Save for Web (Legacy) reliably outputs PNG-24 with transparency.
Step-by-Step: Image Processor Pro for PNG and WebP Output
The built-in Image Processor (File → Scripts → Image Processor) does not support PNG output — it only handles JPG, PSD, and TIFF. This is a frequent point of confusion, as noted on Reddit and Adobe Community. The fix is a free community script.
Download and Install
Image Processor Pro was created by Dr. Russell Brown, Adobe's Senior Creative Director. It adds PNG, WebP, and other formats to the familiar Image Processor interface. Download it from russellbrown.com/scripts.html (free).
Run the Script
- Place the downloaded
.jsxfile in Photoshop's Scripts folder, or use File → Scripts → Browse to locate it. - Select your source folder (the folder containing PSDs).
- Choose PNG as the output format. You can also set a quality level (for PNG this controls compression effort, not lossiness).
- Specify a destination folder and optional filename prefix.
- Click Run. The script processes each PSD and saves a PNG in the destination.
Image Processor Pro preserves metadata better than Export As and gives you WebP support — useful if you need modern web formats that Save for Web (Legacy) cannot produce.
Step-by-Step: Bridge and Photoshop Batch for Folder Management
Adobe Bridge offers two distinct batch paths. One is convenient but buggy; the other is slow but reliable. Here is how to make both work.
Bridge Export Panel (Convenient — but Unreliable)
Select your PSDs in Bridge, then use the Export panel (Window → Export Panel) to choose a preset. The panel outputs PNGs directly — if your PSDs have Maximize Compatibility enabled. Without the composite layer, roughly 90% of files will fail with an "unsupported file format" error, according to the Adobe Community field report. Even when it works, the export is single-threaded and noticeably slow.
🔧 Bridge Export Panel — the fix
Enable Maximize Compatibility on all source PSDs (see the Preparation section above). Then re-save them. The Export Panel will then recognise the files and process them — albeit at roughly 20 seconds per large PSD.
Bridge + Photoshop Batch (Slower, but Reliable)
This approach uses Bridge to select files and then launches a Photoshop action. It avoids the Export Panel's bugs entirely.
- In Bridge, select the PSDs you want to export.
- Go to Tools → Photoshop → Batch.
- In the Batch dialog, choose your action (e.g., "Export PNG SFW") and set source/destination options.
- Click OK. Bridge opens each file in Photoshop, runs the action, and closes the file.
This method is as fast (or slow) as the underlying action. It is single-threaded, so large batches still take time, but it does not suffer from the composite-layer issue because Photoshop handles the file directly.
Advanced Methods for Exporting Layers and Groups as PNGs
Sometimes you need each layer or group exported as its own PNG — for UI kits, sprite sheets, or animation frames. The standard Batch action does not cover this; here are four workarounds.
Generate Assets (with the Blank-Mask Trick)
Name a layer or group with a .png suffix (e.g., "icon-button.png"), and Photoshop automatically exports it as a PNG. The catch: by default, it trims to the content's bounding box, not the full canvas. To keep the full canvas size, apply a blank layer mask to the group (Layer → Layer Mask → Reveal All). As shown in this YouTube tutorial, the mask prevents trimming.
Timeline → PNG Sequence (Full-Canvas Layers)
If you need every visible layer exported at the document's exact canvas dimensions (no trimming), use the Video Timeline method:
- Open the Timeline panel (Window → Timeline).
- Choose Create Video Timeline.
- Click the timeline menu (≡) and select Make Frames from Layers.
- Then choose Render Video. In the Render dialog, set the format to PNG Sequence.
- Photoshop exports each frame (each original layer) as a separate PNG at full canvas size.
This method preserves exact pixel dimensions and is ideal for animation frames or layer-by-layer comparisons. It does not, however, handle groups — only layers.
Layer Comps → Export Layer Comps to Files
If you work with Layer Comps (Window → Layer Comps) to save different visibility/position states, the built-in script File → Scripts → Layer Comps to Files exports each comp as a separate PNG. This is perfect for A/B variations or multi-state UI elements.
Custom Scripting and Plugins
For full control — custom naming, folder structure, per-layer settings — a JavaScript (ExtendScript) script is the way to go. A simple script loops through all layers, copies each to a new document, and saves as PNG. The Stack Overflow thread on batch export includes several script examples you can adapt.
For frequent layer-exporting tasks, a dedicated plugin like Layerbench can streamline the process — it exports selected layers as lossless transparent PNGs, trimming each to its visible-pixel bounds while keeping original scale, and supports batch-exporting multiple selected layers in sequence.
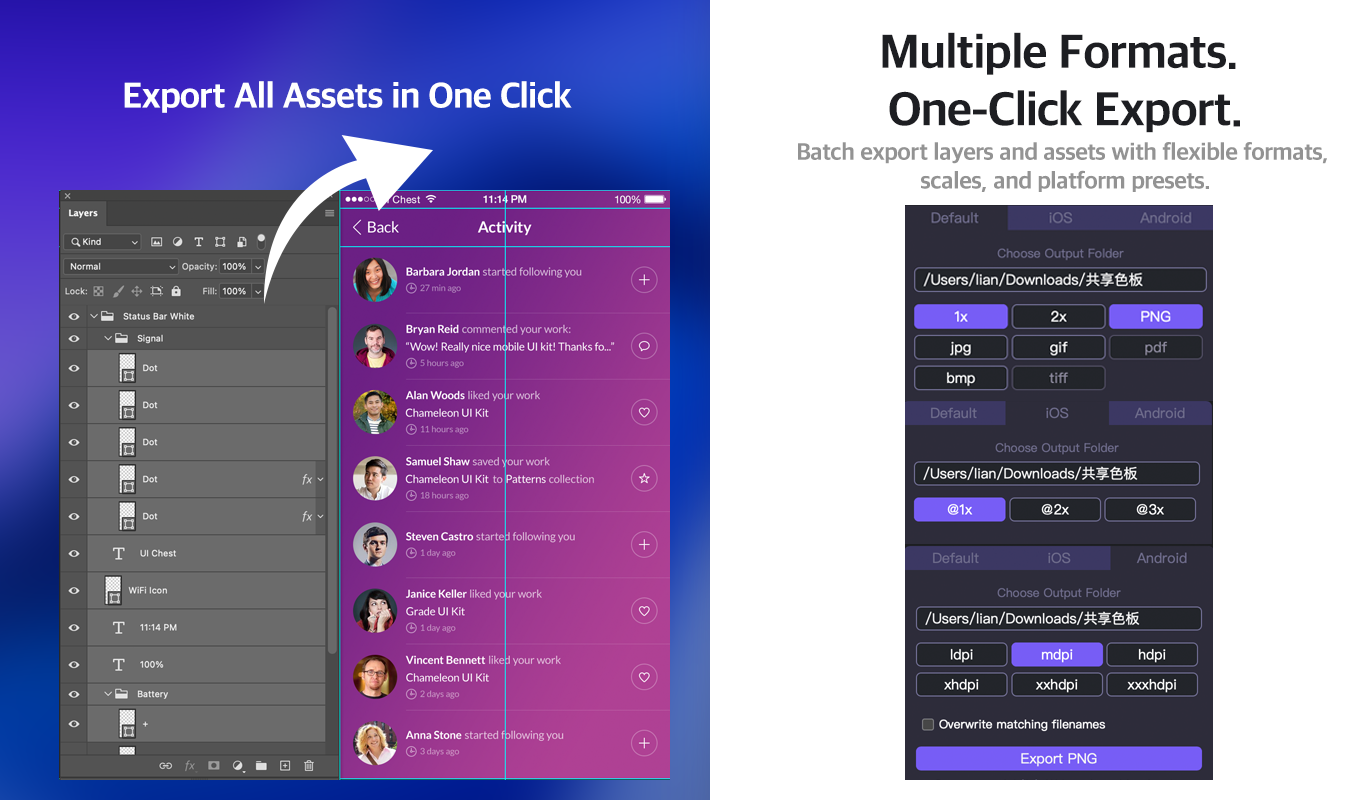
Layerbench — a separate Photoshop plugin: batch-export layers to PNG and other formats with Default/iOS/Android presets and @1x–@3x scales, each trimmed to visible pixels.
Related: how to save a PNG in Photoshop · how to batch edit in Photoshop.
Troubleshooting Common Batch Export Failures
Even with the right method, things can go wrong. Here are the most frequent issues reported across forums — and how to fix each one.
Action stops at Save for Web dialog
The action recorded the Close step without clicking Don't Save. Re-record the action: after Save for Web, close the document and choose Don't Save when prompted.
Transparency lost in Save As
Save As may flatten transparency if the document is not in RGB/8-bit mode, or if layers are incompatible. Use Save for Web (Legacy) instead — it reliably preserves alpha.
Bridge: "unsupported file format"
Missing composite layer. Enable Maximize Compatibility in Preferences and re-save the PSDs. The Bridge Export Panel requires this layer to render the preview.
Metadata stripped from exports
Export As strips all metadata. Save for Web (Legacy) preserves some (copyright, EXIF). For full metadata, use Save As with a flattened copy, or embed metadata after export using ExifTool.
Export As / Quick Export greyed out
These features cannot be recorded in Actions — this is a deliberate Adobe limitation, confirmed by Graphic Design SE. Use Save for Web (Legacy) or a script instead.
Groups exported at wrong canvas size
Generate Assets trims groups to content. Apply a blank layer mask to the group (Layer → Layer Mask → Reveal All) to force full-canvas export. Alternatively, use the Timeline method.
Action cannot be reused with different folders
The destination folder is hardcoded during recording. Create a separate action for each target folder, or use a custom script that accepts folder paths as variables.
Third-party tool loses transparency
IrfanView, XnView, and GraphicsMagick rely on the composite layer. Enable Maximize Compatibility and re-save PSDs. If transparency is still lost, the tool may not support alpha — test with a single file first.
Performance at Scale — What Speeds to Expect and How to Improve Them
Photoshop's batch processing is single-threaded. Each file is processed sequentially, one CPU core at a time. Real-world measurements from a field report on Adobe Community show that larger PSDs can take up to 20 seconds per file. A batch of 1,000 files would therefore run for roughly 5.5 hours — and that is without failures or retries.
Where the Bottleneck Lives
Every method that runs inside Photoshop — Actions, Image Processor Pro, Bridge + PS Batch — is subject to the same single-core limitation. Photoshop opens the file, runs the export logic, saves the PNG, and closes the file. The operating system and GPU provide little help because the bottleneck is the serial file-processing loop.
When to Switch to External Tools
If you regularly export more than 500 PSDs at a time, consider one of these faster alternatives:
- Affinity Photo — uses parallel processing and is substantially faster. According to the same field report, it handled large batches in a fraction of the time. Trade-off: limited metadata support and no drag-and-drop.
- XnView / IrfanView — free, fast, and capable of batch-processing thousands of files. Enable Maximize Compatibility on your PSDs first to ensure transparency is preserved.
- GraphicsMagick (command line) — ideal for automated pipelines. Use
gm convertin a loop. Again, the composite layer is required.
⏱️ Real-world estimate
One designer reported that a batch of 2,400 PSDs took over 13 hours using Photoshop Actions. Switching to Affinity Photo cut that to roughly 45 minutes — a 17× improvement. The composite layer was enabled on all files.
How to Verify Your Exported PNGs Are Correct
Batch exports can fail silently — a missing composite layer, incorrect colour mode, or a misconfigured action can produce PNGs that look wrong. Always run a verification pass before distributing the files.
- Check transparency. Open a few PNGs in Photoshop or a viewer that shows alpha. If a file that should have a transparent background shows a white or black fill, the export method did not preserve alpha. Re-export using Save for Web (Legacy) with the Transparency checkbox checked.
- Check metadata. In Photoshop, go to File → File Info (
Cmd+Opt+I/Ctrl+Alt+I). Verify that copyright, author, EXIF, and other metadata survived. If metadata is missing, switch to a method that preserves it (Save As or Image Processor Pro) or re-embed it using ExifTool. - Check file size. A 100 MB PSD exporting to a 10 KB PNG suggests lost detail or incorrect settings. Compare the output size to a known-good export from the same source. If sizes vary wildly, review your compression and preset choices.
- Check canvas dimensions. If your PNGs show only the content (trimmed) rather than the full canvas, the Generate Assets method or a script may have trimmed transparent pixels. Use the blank-layer-mask fix (see Advanced Methods) or the Timeline PNG Sequence method to preserve full dimensions.
- Run a consistency check. For a sample set (10–20 files), compare pixel dimensions and colour profiles of the source PSDs against the output PNGs. Free tools like ImageMagick can script this comparison:
identify -verbose *.png | grep "Geometry\|Depth\|Type".
Once all five checks pass, your batch is ready for deployment. Store the action or script you used so the same process can be repeated consistently.
All trademarks and product names referenced belong to their respective owners. Adobe, Photoshop, and Bridge are registered trademarks of Adobe Inc. Affinity Photo is a trademark of Serif (Europe) Ltd. This article is an independent guide written for educational purposes.