- Category:
- Background Removal
- Summary:
- Compare the best Photoshop cutout plugin for hair, smoke, and reflections, with top picks for different scenarios and guidance on when native tools fall short.
What this article covers: This page compares third‑party Photoshop plugins for background removal and subject cutout — not the artistic Cutout filter. If you need to pull a subject from its background and keep every strand of hair, every reflection, and every wisp of smoke, the tools below are your options.
→ Top picks at a glance: Remove.bg for hair on high‑contrast shots, Nero AI for combined cutout + upscaling, Topaz Photo AI for edge quality, and Layerbench for one‑click cutout with edge cleanup. See the full table below.
When Native Photoshop Tools Are Enough — and When They Aren’t
The 4‑Step Native Workflow for Simple Subjects
Adobe’s own cutout tutorial recommends a straightforward sequence for subjects with clean edges: use the Object Selection or Quick Selection tool to make a selection, invert it, and add a Layer Mask. This works well for product shots on white, solid‑colour backdrops, or any scene where the subject contrasts clearly with its background. Total time: about 30 seconds for a practised user.
Select and Mask for Complex Edges
When the background is cluttered or the subject has soft edges, the Select and Mask workspace gives you sliders to control the result. Adobe’s documentation highlights five key controls: Radius (edge detection width), Smooth (reduces jaggedness), Feather (softens the edge), Contrast (sharpens transition), and Shift Edge (contracts or expands the mask). For hair, the Refine Edge brush inside Select and Mask lets you paint over flyaway strands — Photoshop calculates their transparency automatically. This approach can handle moderately tricky edges but struggles when hair colour blends into the background.
Why the Pen Tool Is Still the Gold Standard for Precision
Experienced retouchers consistently name the Pen tool as the most precise method for cutouts. As one graphic designer notes on Quora, “For greatest precision, nothing works as well as the pen tool.” It excels on hard curves — product edges, architectural lines, vehicles — where even the best AI can introduce micro‑jitter. The trade‑off is time: a detailed path can take several minutes per subject.
When Native Tools Fail
Two scenarios consistently trip up Photoshop’s built‑in AI and manual tools:
- Hair on busy backgrounds: When hair colour is close to the wall or backdrop, Object Selection and Select Subject lose the fine strands. The closer the tone match, the harder the cutout becomes.
- White‑on‑white subjects: A white product on a white background offers almost no edge contrast for AI to detect. Native Select Subject often produces a jagged or incomplete mask, forcing you to fall back on manual painting or channel‑based extraction.
These are exactly the situations where a dedicated plugin can save time — or produce a result that native tools cannot achieve at all.
The 5 Hidden AI Cutout Algorithms Inside Photoshop (and How to Access Them)
According to the photoshopCAFE channel, recent versions of Photoshop contain five distinct AI‑powered cutout methods, including one that is not labelled as a cutout tool. They are:
- Select Subject (menu: Select > Subject) — one‑click AI detection.
- Object Selection (toolbar) — lets you drag a rectangle or lasso around the subject.
- Quick Selection (toolbar) — paint‑driven edge detection.
- Remove Background (Properties panel, Quick Actions) — instant mask creation.
- The hidden one: Using Content‑Aware Fill (Edit > Fill > Content‑Aware) on a selection of the background can sometimes separate a subject when the other tools fail — though it is not designed for cutouts.
All five rely on the same underlying AI model, so their performance degrades similarly on low‑contrast or busy backgrounds. Access them through the menus listed above; no plugin installation is needed.
How to Install Any Third‑Party Cutout Plugin in Photoshop
Locating the Plug‑ins Folder
Every third‑party plugin must be placed in Photoshop’s Plug‑ins directory. The default paths are:
- Windows:
C:\Program Files\Adobe\Adobe Photoshop [version]\Plug-ins - Mac:
/Applications/Adobe Photoshop [version]/Plug-ins
Some plugins provide their own installer; others ship as a .8bi file that you copy manually. Always restart Photoshop after adding or updating a plugin.
Installing Through the Plugin Marketplace
Since Photoshop 22.0 (October 2020), Adobe has offered the Plugin Marketplace. Go to Window > Plugin Marketplace, search for the plugin you want, and click Install. The Adobe HelpX page lists compatible plugins and explains how to manage them. This method is the simplest and keeps the plugin updated automatically.
Manual Installation for .8bi Files
If your plugin comes as a .8bi file:
- Quit Photoshop completely.
- Copy the
.8bifile into the Plug‑ins folder (see paths above). - Restart Photoshop. The plugin appears under the Filter menu or as a panel under Window > Extensions.
If you see a “plugin is incompatible with this version of Photoshop” error, check whether the developer provides a version for your release — older .8bi plugins may not work in Photoshop 2025 or later.
Mac vs. Windows Compatibility Notes
Most modern plugins are cross‑platform. Topaz Photo AI, for instance, runs identically on both operating systems. Some plugins — especially those with hardware‑accelerated AI — may require specific GPU drivers on Windows or Metal support on Mac. Always check the developer’s system requirements before purchasing.
Side‑by‑Side Comparison of Top Cutout Plugins
Plugin Comparison Table
| Plugin | Key Feature | Price Model | Hair Handling | Batch Support | Platform |
|---|---|---|---|---|---|
| Remove.bg | AI background removal with hair refinement | 5 free credits/mo then subscription | Strong on high‑contrast hair | Yes (API) | Win / Mac |
| Nero AI | Cutout + upscaling in one plugin | Free trial then subscription | Good on moderate hair | Yes | Win / Mac |
| Topaz Photo AI | Edge quality & noise reduction | One‑time purchase | Very good with edge refinement | Yes | Win / Mac |
| Retouch4me | AI retouching + cutout | One‑time per module | Moderate (focus on retouching) | Limited | Win / Mac |
| EZ Mask | Interactive masking for fine detail | One‑time | Strong (smoke, reflections) | No | Win / Mac |
| Layerbench | One‑click cutout + edge cleanup | — | Uses Select Subject + manual cleanup | Yes (layer export) | Win / Mac |
Based on features listed by Adobe HelpX, Remove.bg, Nero AI, RetouchingZone, and Layerbench. Pricing and features may change; verify with each vendor.
How Each Plugin Performs on Real Images
Because no independent benchmark currently publishes side‑by‑side results on identical images, the ratings below are drawn from vendor claims, community reports, and documented feature sets. Test each plugin on your own most challenging image before committing.
Remove.bg
Claims top‑quality results for hair in challenging conditions. Free tier gives 5 credits per month — enough for quick tests. Best for high‑contrast subjects where hair is clearly separated from the background.
Nero AI
Combines background removal with upscaling in one step. Useful for e‑commerce workflows where you need a transparent PNG at hi‑res. Free trial available.
Topaz Photo AI
Known for edge quality and noise reduction. Its cutout module integrates with the broader Topaz ecosystem. One‑time pricing makes it cost‑effective for frequent users.
Retouch4me
Primarily a retouching suite, but its cutout module handles standard edges well. Best if you already use Retouch4me for skin work and want an all‑in‑one retouching workflow.
EZ Mask
Adobe’s directory describes it as capable of extracting “almost any object … even fine hair detail, smoke, or reflections.” Requires interactive input — not a one‑click solution.
Layerbench
Offers one‑click cutout via Photoshop’s Select Subject, plus a mask‑only mode and edge cleanup with a Minimum (shrink) radius of 1–3 px. Also supports lossless layer export to transparent PNGs.
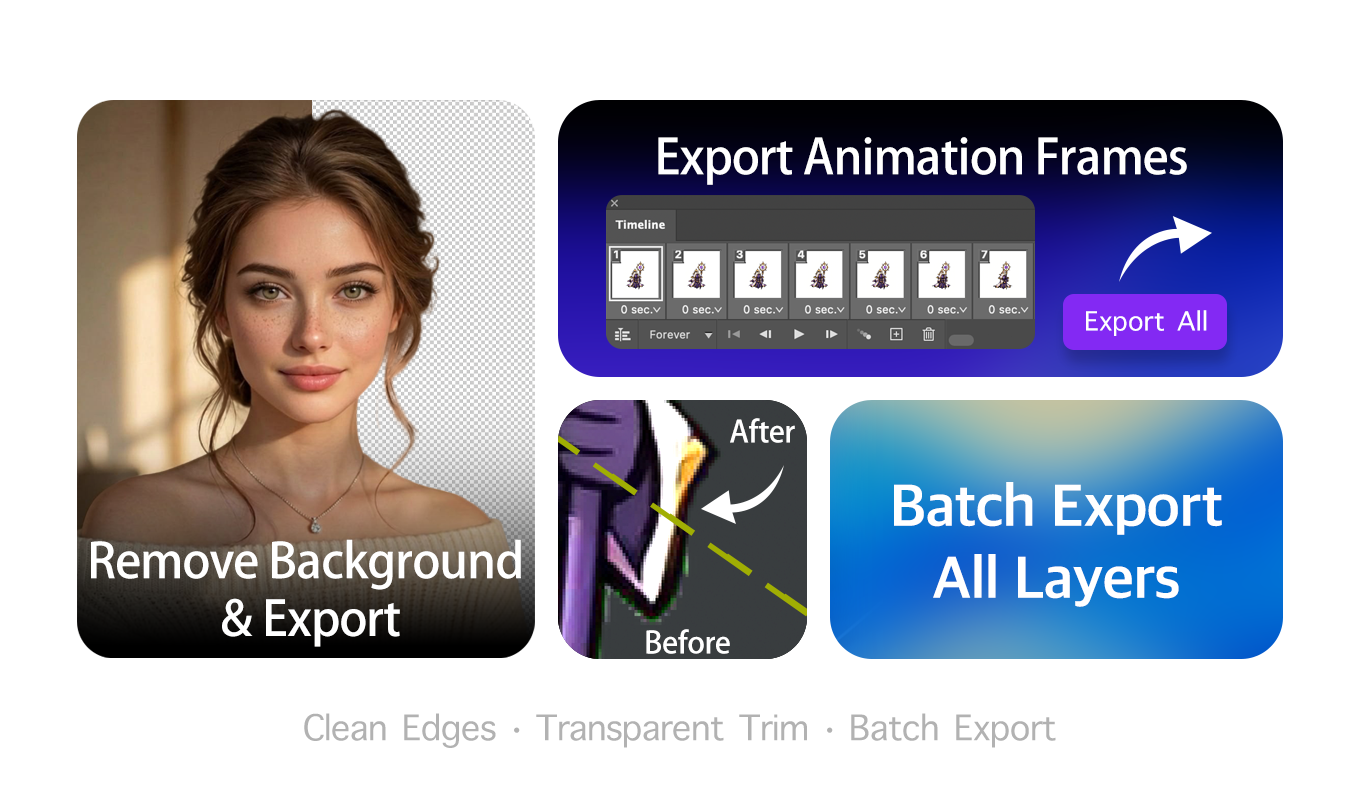
Layerbench — a separate Photoshop plugin: cut the subject to transparency, trim transparent margins, and batch-export layers, all in one panel.
Related: Photoshop background-removal plugins compared · object selection tool.
Free and Budget‑Friendly Cutout Options
Free In‑House Tools
Every Photoshop subscription includes two zero‑cost cutout methods:
- Remove Background button — found in the Properties panel under Quick Actions. One click, instant mask. Works best on high‑contrast subjects.
- Select Subject + Layer Mask — the classic two‑step workflow. Reliable for simple shapes and solid backdrops.
Neither consumes generative credits, so you can use them as often as needed with no cap.
Free Tiers and Open‑Source Plugins
If your budget is tight, these options give you a way to test before buying:
- Remove.bg free tier — 5 free credits per month. Enough to evaluate on your own images before subscribing.
- Nero AI free trial — full access for a limited period. Check their site for current terms.
- G’MIC — an open‑source image processing framework that runs as a Photoshop plugin. It includes several background‑removal and masking filters. The interface is less polished than commercial tools, but the price (free) is hard to beat.
Tip
Start with Photoshop’s built‑in Remove Background on your five most challenging images. If the results are acceptable, you may not need a plugin at all. If they fall short, use the free tiers above to compare two or three plugins on the same images before purchasing.
Advanced Workflow — Combining a Plugin with Manual Refinement
Step‑by‑Step: Plugin ➞ Mask ➞ Refine
No plugin gets every pixel right every time. The most efficient approach is to let AI do the rough cutout (the 80%) and then fix the remaining 20% manually. Here is a repeatable workflow:
- Run your chosen AI plugin — for example, Remove.bg or Layerbench — to generate an initial cutout. This gives you a layer with a transparent background or a layer mask.
- Convert the result to a Layer Mask if the plugin did not create one automatically. (Right‑click the layer thumbnail > Add Layer Mask > Reveal Selection.)
- Use the Refine Edge brush (Select & Mask workspace) on problem areas — stray hairs, soft edges, glass reflections. Paint directly over the edge; Photoshop recalculates transparency.
- Paint corrections on the mask with a black or white brush at low opacity. Black hides, white reveals. This is the simplest way to fix large missed areas.
- Apply Select and Mask for final global adjustments. Use the Radius, Smooth, Feather, Contrast, and Shift Edge sliders to dial in the edge character.
This hybrid workflow typically takes 2–4 minutes per image once you are familiar with it — faster than a fully manual Pen tool path and more accurate than a pure one‑click AI result.
Cleaning Up Color Fringe Post‑Cutout
AI cutouts often leave a thin colour halo — typically cyan, magenta, or white — around the subject. To remove it:
- Defringe command: Layer > Matting > Defringe. Set a radius of 1–2 px. This replaces the fringe colour with the nearest clean edge pixel.
- Layerbench edge cleanup: If you are using Layerbench, its Minimum (shrink) function with a 1–3 px radius contracts the mask by the specified amount, shaving off the halo. Apply it to an existing mask without re‑cutting the whole image.
- Hue/Saturation trick: Create a Hue/Saturation adjustment layer clipped to the subject layer, target the fringe colour (e.g., cyans), desaturate it, and lighten or darken it until the halo disappears.
Note
Defringe and Minimum both shrink the mask slightly. If the subject has soft edges (fur, smoke, motion blur), a 2 px shrink can look unnatural. Use the smallest radius that eliminates the fringe, and zoom to 200% to check.
Real‑World Cutout Headaches and How to Fix Them
Hair Blending into the Background
This is the most common complaint across community forums. When hair colour matches the wall, even the best AI tools produce a blocky or missing edge. The fix requires manual intervention:
- Use the Refine Edge brush in Select and Mask — paint along the hair boundary and let Photoshop calculate partial transparency.
- For extreme cases, duplicate the channel with the highest contrast (usually Red or Green), use Levels to push the hair/background separation, and load that channel as a selection.
- If the background is busy but contrasts in colour, try a Color Range selection (Select > Color Range) sampled from the background, then invert.
“The hair, in particular, will be much more difficult to delineate; the closer the hair color is to the wall, the harder it gets.”
— graphic designer on Quora, discussing AI cutout limitations
White‑on‑White Subjects
Native Select Subject often produces an incomplete or jagged mask on white products against white backgrounds. The reliable workaround:
- Add a temporary coloured fill layer (e.g., red) behind the subject to create contrast, then use Select Subject. Once the mask is created, delete the fill layer.
- Alternatively, use the Blend If sliders in the Layer Style dialog to hide the white background by dragging the “This Layer” white slider inward, then convert the result to a mask.
Color Fringing After AI Cutout
Described in the workflow section above. The key takeaway: catch fringing early by zooming to 200% around high‑contrast edges. A quick Defringe (1 px) solves most cases. If the fringe persists, use Layerbench’s edge cleanup or a targeted Hue/Saturation layer.
Generative Credits Concern
Some Photoshop AI features consume generative credits, which are capped per month depending on your plan. If you want to avoid burning credits:
- Use non‑AI plugins like EZ Mask or the Pen tool for manual masking.
- Use local AI plugins like Topaz Photo AI or Retouch4me that run on your own hardware and do not phone home to a cloud server.
- Stick with Photoshop’s built‑in Remove Background and Select Subject — they do not consume generative credits either.
Community Insight
Several designers on Facebook’s Phlearn community report that they keep two plugins installed: one AI‑based for quick drafts and one manual masking tool (like EZ Mask) for the final polish. This avoids credit exhaustion while maintaining quality.
The Next Step — Test a Plugin on Your Own Image
The fastest way to find the right plugin is to try one on the image that currently gives you the most trouble. Here is a concrete plan:
- Pick one plugin from the comparison table. If you mostly cut out portraits with hair, start with Remove.bg (free trial available). If you need batch exports for e‑commerce, try Layerbench or Nero AI.
- Install it using the instructions in the installation section above — use the Plugin Marketplace if available, or copy the
.8bifile manually. - Run it on your hardest image — windblown hair, a glass bottle with reflections, or a white‑on‑white product. Note where the result is good and where it misses.
- Apply the combination workflow from Section 6: plugin ➞ mask ➞ Refine Edge brush ➞ manual brush corrections. This usually turns an 80% result into a 95% result.
- Repeat with a second plugin on the same image. Compare the two outputs side by side. Your choice ultimately depends on which handles your most common subject types with the least manual cleanup.
No single plugin suits every image. But by testing systematically — one challenging image, two plugins, the same refinement steps — you will quickly discover which tool earns a place in your daily workflow.