- Category:
- Workflow Tips
- Summary:
- Learn how to unmerge layers in Photoshop with three methods: using the immediate undo command, leveraging the History panel, and recovering after saving.
The short answer
If the file is still open: press Ctrl+Z (Cmd+Z on Mac) or open Window > History and click the state just before the merge. If you saved and closed the file, no built-in feature can restore the original layers — the data is permanently lost. Jump to the prevention section to avoid this going forward.
Quick Decision Guide – Which Method Fits Your Situation?
Whether you can unmerge depends entirely on what you did after the merge. The table below maps the three most common scenarios to the method that works — or explains why nothing will.
| Scenario | Best method | Why it works (or doesn't) |
|---|---|---|
| You just merged — file still open, no save yet | Ctrl+Z / Edit > Undo | Undo reverses the last action; works immediately after merge |
| Merged, saved, but file still open | History panel (click state before merge) | History is stored in RAM — saving writes to disk but doesn't clear history |
| Merged, saved, and closed | No direct unmerge possible | History cleared from RAM; original layer data destroyed on merge |
The Immediate Undo – Ctrl+Z and Edit > Undo Merge Visible
If you spot the mistake right after merging — before doing anything else — this is the fastest route. On Windows press Ctrl+Z; on Mac press Cmd+Z. Photoshop undoes the last action, which is the merge itself. If you prefer the menu path, go to Edit > Undo Merge Visible (the label changes to reflect the last action).
This method depends on timing: it works only when the merge was your most recent action. If you painted, selected, or adjusted anything after merging, Ctrl+Z reverses that newer action instead. You may need to press it multiple times to step back through your action stack — Photoshop's default History States setting is 50, so you have room.
⚠️ Common pitfall
If you saved after merging but haven't closed the file, Ctrl+Z may not undo past the save point. Switch to the History panel method instead — it works even after saving as long as the file remains open.
The History Panel – Point Before the Merge
The History panel is a more powerful undo tool because it lets you jump to any recent state — not just the last one. This is the recommended approach when you've done other work after merging or if you saved the file but haven't closed it.
- Open the History panel via Window > History.
- Scroll through the list of actions until you find an entry labelled "Merge Layers", "Merge Visible", or "Flatten Image".
- Click the state immediately above that entry (the one just before the merge happened). Photoshop reverts the document to that point, restoring all previously separate layers.

The History panel displays every recent action. Click the state above the merge to restore your original layers.
The critical detail: the History panel lives in RAM. As long as the file remains open — even if you saved it — those states are still there. The moment you close the file, the panel is cleared and the history is gone. This is the most important rule to remember about this method.
💡 Pro tip
You can increase the number of history states in Edit > Preferences > Performance (up to 1,000). Do this before you merge — it won't help retroactively, but it gives you a longer safety window for future work.
What If You Already Saved But Haven't Closed – File > Revert and the History Panel
This intermediate scenario often confuses users. You merged, then saved the file, but you haven't closed it yet. Two options exist:
Option 1: File > Revert. This returns the document to the last saved version. However, if you saved after the merge, the saved version already contains the merged layers — Revert won't help. Use this only if you saved before the merge and haven't saved again since.
Option 2: History panel (still works). Even though you saved, the History panel retains all actions taken since the file was opened. Simply click the state before the merge as described in the previous section. Saving writes the current state to disk but does not clear the history stack.
I merged all my layers and saved the PSD, but I hadn't closed it. The History panel still had the "Merge Layers" entry. I clicked one step above it and everything came back.
— Reddit user johngpt5, describing a successful recovery
After Saving and Closing – Why It's Impossible and What Adobe's Expert Says
This is the hard truth that many Photoshop users discover the painful way: once you save and close a merged file, there is no built-in "unmerge" feature. The original layer data no longer exists in the file.
An Adobe Community expert put it plainly: "You can get them back no more than one can get a grain of wheat back out of a cake." When you merge layers, Photoshop rasterises them into a single pixel grid. Blend modes, masks, layer effects, and transparency are all baked into that flat raster. The original separate pixel arrays and metadata are discarded during the merge operation itself — saving only finalises that loss to disk.
⚠️ No third‑party shortcut either
No reliable plugin can reconstruct original layers from a flattened PSD or JPEG. Some tools claim to separate by colour or luminance, but they do not restore true layer structure, blend modes, or masks. If a plugin promises "unmerge," treat the claim with scepticism.
Limited Recovery Options When You Have Only a Flattened Image
While you cannot truly unmerge, a few partial recovery paths exist — their usefulness depends on what you still have and how complex the original layers were.
Backup files – the only real recovery
If you saved incremental versions (project_v1.psd, project_v2.psd, etc.), earlier copies of the file may still contain the layers. Creative Cloud subscribers can also check version history: right‑click the file in the Creative Cloud desktop app and select View Version History. System-level backups (Time Machine, File History, cloud sync) may hold older PSDs as well.
Re‑selection workarounds for simple designs
For designs with distinct shapes, solid colours, or clean text, you can manually re‑isolate elements using selection tools. The Magic Wand, Quick Selection tool, and Select > Color Range can pick out individual objects. Content‑Aware Fill or Generative Fill can reconstruct missing areas behind separated elements. This is painstaking and not true unmerging, but it can salvage parts of a simple composition.

For simple compositions, selection tools can re‑isolate individual objects from a flattened layer.
Neural Filters – unproven for this use case
A YouTube video title mentions Neural Filters as a potential recovery tool, but no detailed workflow has been published. As of 2026, Neural Filters (such as Photo Restoration) are designed for image repair, not layer reconstruction. Treat this as an unproven avenue rather than a reliable method.
How to Avoid This Problem – Non‑Destructive Workflow Best Practices
The only foolproof solution is to structure your work so that merging becomes unnecessary — or reversible when you do it. These practices take seconds to implement and can save hours of frustration.
Use Smart Objects before merging
Right‑click a layer and choose Convert to Smart Object. Smart Objects preserve the original layer data inside a container; even if you merge, transform, or filter the Smart Object, you can double‑click it to access the original content. This is the single most effective safeguard.
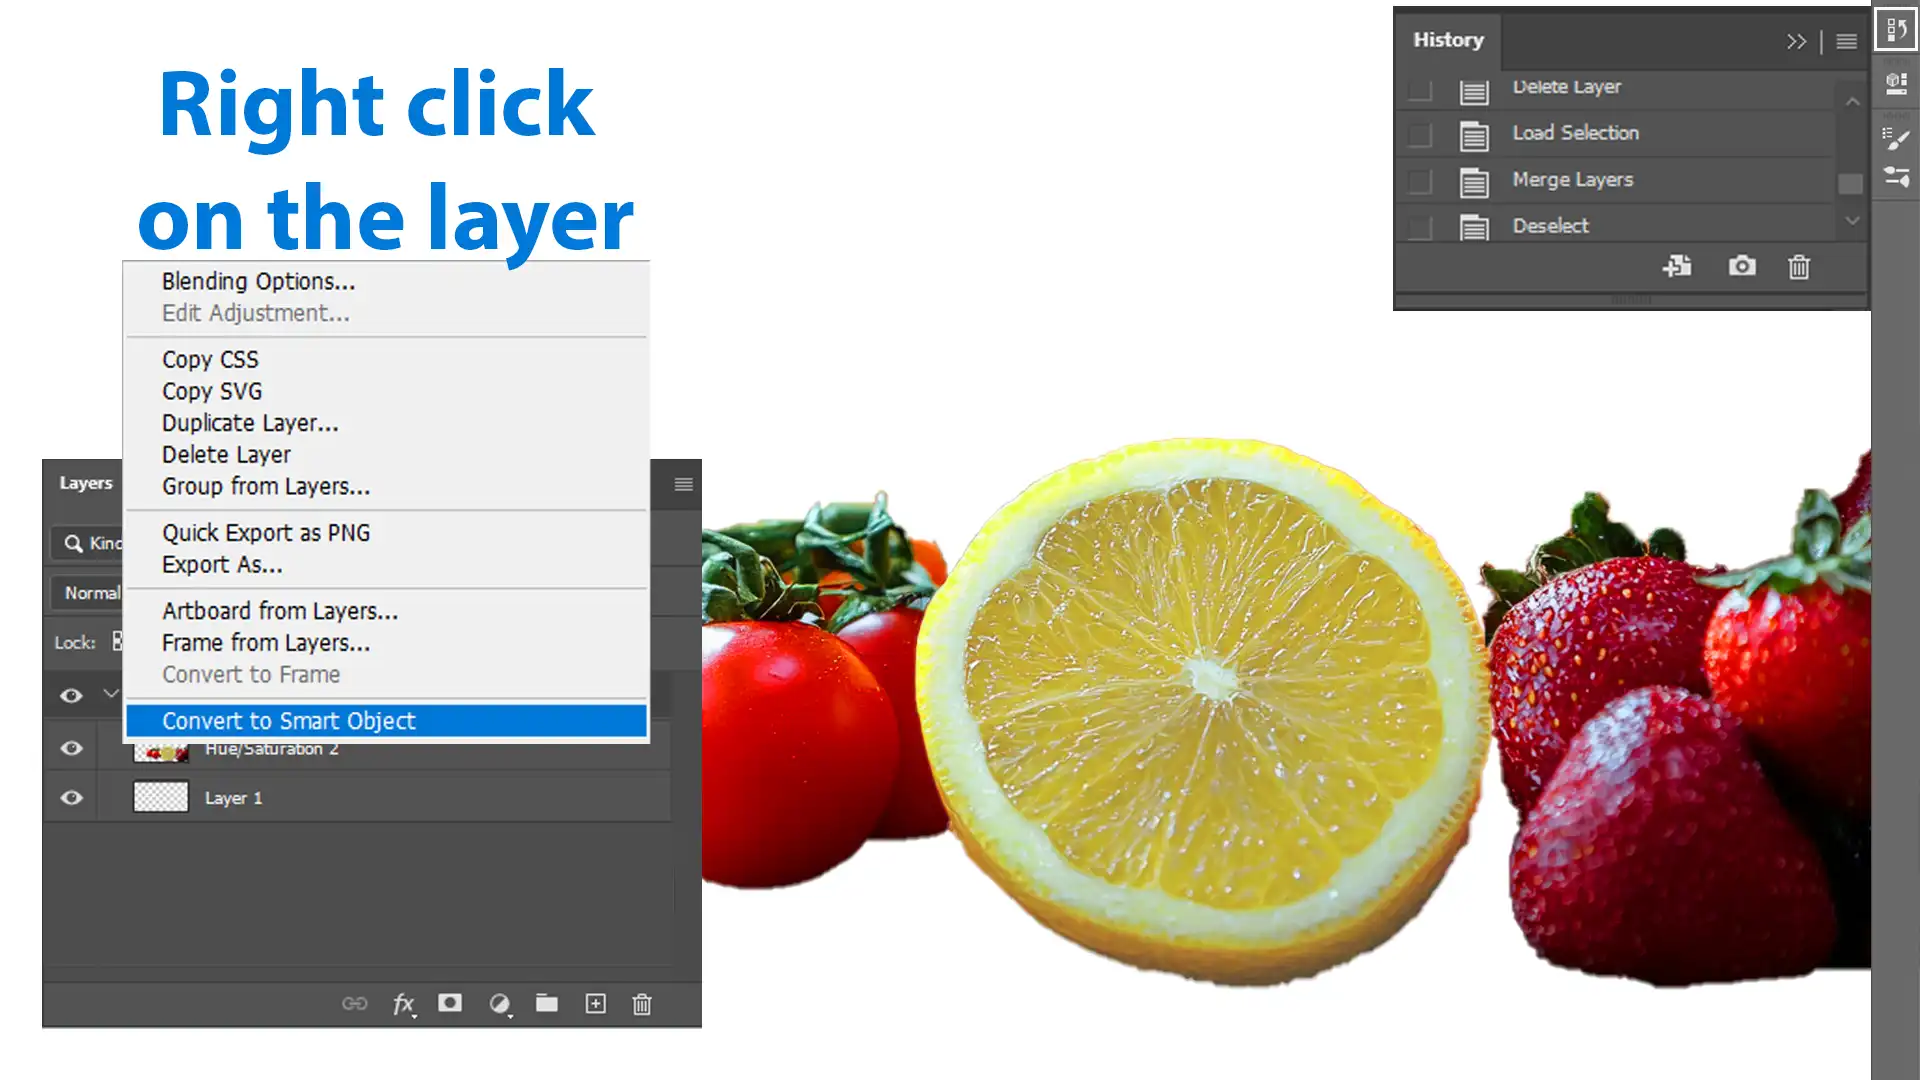
Converting a layer to a Smart Object before merging preserves the original data inside the object.
Organise with groups and adjustment layers
Instead of merging, use layer groups (select layers and press Ctrl+G / Cmd+G) to keep your panel tidy. Apply global tweaks via adjustment layers (Brightness/Contrast, Curves, Hue/Saturation) rather than baking them into a merged layer. This keeps every edit reversible.
Save incrementally and use version history
Before any merge or flatten operation, save a numbered copy: poster_v1.psd, poster_v2.psd. CC users can rely on Adobe's built-in version history — right‑click the file in the Creative Cloud app and revert to an earlier version if needed.
Export instead of flatten
When you need a JPEG or PNG for email, web, or client review, use File > Export > Export As (or Save for Web) rather than flattening the original PSD. The original layered file stays intact on your drive. For batch exports, dedicated tools such as Layerbench offer one‑click lossless transparent PNG export from selected layers, which can be a time‑saver in production workflows.
💡 Prevention checklist
- Duplicate the layer group before merging (select group,
Ctrl+J/Cmd+J).- Save a separate PSD before any flatten or merge action.
- Use Export As for web/email versions instead of Flatten Image.
- Enable Auto‑Save in Photoshop Preferences (File Handling) with a short interval.
- Convert critical layers to Smart Objects early in your workflow.
What to Do Next – Set Up a Non‑Destructive Workflow Today
Take one concrete step right now. Open an existing project and convert your critical layers to Smart Objects:
- Select a layer that contains important content (type, illustration, cut‑out image).
- Right‑click the layer and choose Convert to Smart Object.
- Save the file as a new version (
_v2.psd).
That's it. Thirty seconds of work that means no future merge is permanent. From here, you can group, adjust, and even merge copies of the Smart Object — the original data stays safely inside, double‑clickable anytime.
For a deeper look at non‑destructive techniques, explore working with selections and layers or the Select and Mask workflow — both preserve flexibility in ways that merging cannot.