- Category:
- Export & Automation
- Summary:
- Photoshop export artboards as PNG: three methods (batch, right-click, quick export) with solutions for transparent backgrounds and missing resolution metadata.
Three ways to export artboards as PNG, and what each one handles well:
Batch export — File › Export › Artboards To Files (PNG-24, strips resolution metadata)
Right‑click export — select artboard group(s) in Layers panel → Export As or Quick Export as PNG
Quick Export — Layer › Quick Export as PNG (fastest, single artboard only)
Key pain points this article solves: transparent backgrounds that export as white, resolution metadata being stripped, and menu items that go grey or export the wrong artboard.
Which Export Method Keeps Your Resolution and Color Profile?
Not all PNG export routes in Photoshop preserve the same metadata. The table below — based on a detailed community analysis — shows what each method retains.
| Method | Resolution metadata (PPI) | ICC profile |
|---|---|---|
| Save As PNG | Yes | No |
| Export As PNG | No | Yes |
| Save for Web PNG | No | Yes |
No single built-in method retains both resolution and ICC profile. The PNG specification stores resolution in pixels per metre — 11 811 ppm equals 300 ppi — but Export As and Save for Web both strip that field. If you need 300 DPI for print, Save As PNG is the only native option that keeps the value, though it drops the colour profile. For web use, the trade‑off rarely matters; for print, plan a workaround (the 300 DPI section below covers one).
Photoshop’s artboard export handles several formats; PNG requires attention to transparency and resolution settings.
Three Ways to Export Artboards as PNG in Photoshop
Each method suits a different scenario. The cards below give a quick orientation; the numbered steps that follow walk through every option.
Batch
Artboards To Files
Export several artboards at once. Offers prefix naming, format choice, and selection of specific artboards.
Selective
Right‑Click Export
Choose individual artboard groups in the Layers panel. Quick Export as PNG or Export As for more control.
Fastest
Quick Export
One click on a layer or group. Ideal for a single artboard when you need a PNG immediately.
File > Export > Artboards To Files (Batch Export)
This is the official method for exporting multiple artboards in one pass. The dialog was introduced in Photoshop CC and remains the primary batch route as of the current version.
- Go to File > Export > Artboards To Files.
- Click Browse and choose a destination folder.
- Enter a File Name Prefix that will appear at the start of every exported file.
- Under Contents, choose Artboard Contents Only (crops each artboard to its own bounds) or Overlapping Contents (includes content that bleeds into neighbouring artboards).
- Check Include Background Contents if you want the artboard background colour to appear in the PNG — leave unchecked for transparency (though see the transparent background section for known issues).
- Select Export Selected Artboards Only and pick the specific artboards from the list, or leave it unchecked to export all.
- From the Format dropdown, choose PNG.
- Optionally check Include Artboard Name in Filename to append each artboard’s layer name.
- Click Export Options to set PNG compression (Smaller File vs Larger File) and interlacing, then click OK. Finally, click Run.
Files land in the destination folder as individual PNGs. For full official steps, see the Adobe HelpX documentation.
The File > Export menu path for batch-exporting artboards.
Right‑Click Export from the Layers Panel
In the Layers panel, each artboard appears as a group. You can export one or more of them without opening the batch dialog:
- Click an artboard group to select it. Shift‑click multiple groups to export several.
- Right‑click one of the selected groups.
- Choose Export As (opens the full Export As dialog with size, format, and quality controls) or Quick Export as PNG (saves immediately with current quick-export preferences).
This method works well when you only need a few artboards and want to avoid the batch dialog. The Export As option also lets you scale output, set canvas size, and choose between PNG‑8 and PNG‑24. A StackExchange discussion confirms that right‑click export respects your selection — unlike the File > Export > Export As menu, which forces an "Export All" behaviour when artboards are present.
Quick Export as PNG (Single Artboard Only)
The fastest route: select the artboard group or a layer inside it, then go to Layer > Quick Export as PNG, or right‑click and pick Quick Export as PNG. The file saves to your default export folder with the layer name as filename.
To customise Quick Export settings (format, colour space, transparency handling), go to Edit > Preferences > Export (Windows) or Photoshop > Preferences > Export (macOS). For a deeper comparison of Photoshop's PNG routes, see how to save a PNG in Photoshop and the broader guide to exporting from Photoshop.
Transparent Background Not Working When Exporting Artboards as PNG? Try These Fixes
A recurring issue — confirmed by multiple users across Reddit and Adobe Community — is that artboard PNGs export with a white background even when the artboard background is set to transparent. The problem appears in Export As, Save for Web, and even Artboards To Files. Below are community‑tested workarounds, ordered from quickest to most definitive.
Select the Layer, Not the Artboard
Several users report that clicking the actual content layer inside the artboard group — not the group itself — and then doing right‑click > Export As produces a transparent PNG. This workaround bypasses whatever opacity the artboard container imposes. One Adobe Community member described it as the fix after months of frustration.
Tip
If your design has multiple layers per artboard, select the topmost visible layer or a group that contains all the content but not the artboard background. The key is to avoid the artboard group as the export source.
Double‑Check the Properties Panel
With the artboard selected, open the Properties panel (Window > Properties). At the bottom, find the Background dropdown. Ensure it is set to Transparent, not White or another colour. Some users find the setting has reverted; reapplying it and re‑exporting can resolve the issue.
Change the Document Color Profile
One Reddit contributor traced the white‑background problem to documents created with Adobe RGB (1998) or CMYK profiles. Switching to sRGB or choosing "No color management" when creating a new file fixed the export. If your document already uses Adobe RGB, try converting it via Edit > Convert to Profile and selecting sRGB.
Start Over Without Artboards
Multiple community voices — including the Adobe Community thread and Reddit — advise avoiding artboards entirely for transparent PNG work. The workaround: create a file without artboards, import your layers, hide the background layer, and export as PNG. The transparency behaves reliably outside the artboard system.
Note
The official Adobe HelpX documentation implies that setting the artboard background to transparent should work, but the volume of user reports suggests a persistent bug — possibly related to colour‑profile interactions or how the artboard layer group handles opacity. The layer‑selection workaround is currently the most reliable path.
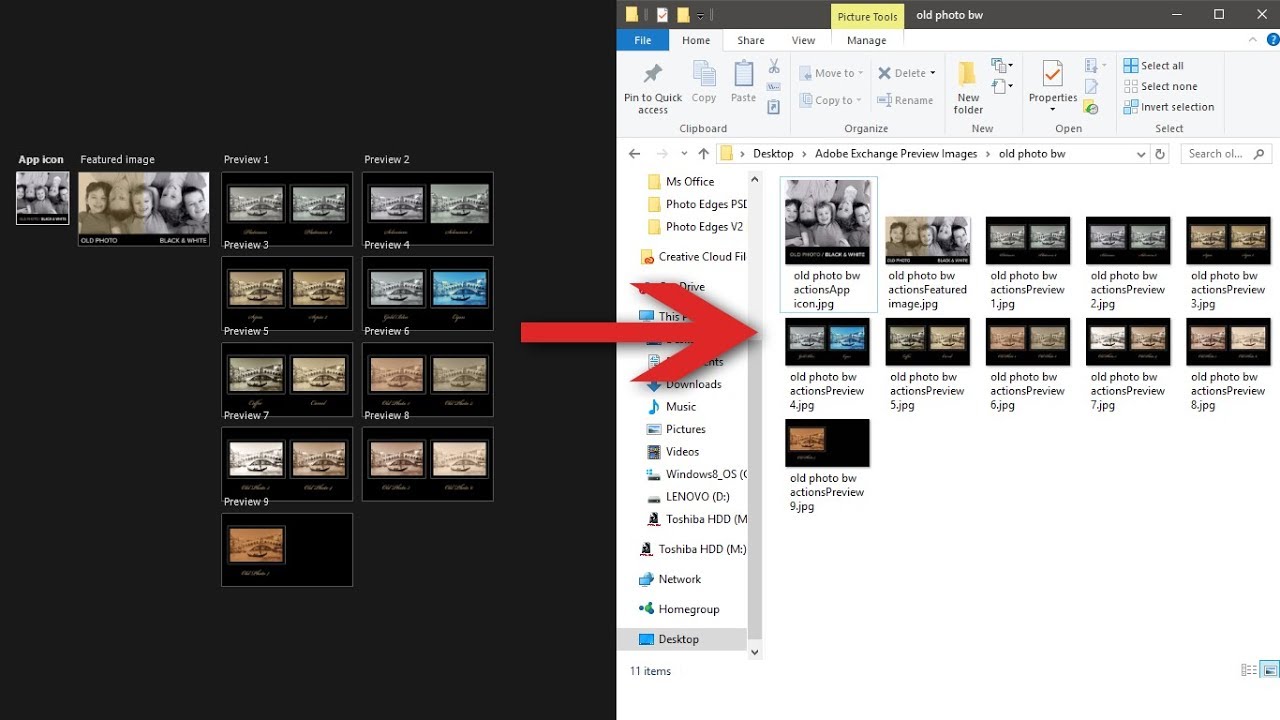
After a successful batch export, each artboard appears as a separate PNG in the destination folder.
How to Export Artboards as PNG at 300 DPI (or Any Custom Resolution)
Print‑ready PNGs require a resolution of 300 ppi embedded in the file. As the comparison table above shows, only Save As PNG retains resolution metadata — but Save As doesn’t natively support multi‑artboard export. Here are three ways to get the best of both.
Use Save As Instead of Export As
For a single artboard: select the artboard group, choose File > Save As, pick PNG from the format dropdown, and ensure you’re saving the selection (not the entire canvas). The resolution metadata (set in Image > Image Size) will be preserved. This method keeps the 300 DPI value but drops the ICC profile — acceptable for most print workflows that use a separate colour‑management step.
The JavaScript Workaround – artboardsToPNG.jsx
A script developed by Anton Lyubushkin and shared in an Adobe Community discussion solves the resolution problem by calling Save As internally for each artboard. It retains the full 300 ppi metadata and handles multiple artboards in sequence.
Installation steps:
- Download or copy the
artboardsToPNG.jsxscript from the community thread linked above. - Place it in your Photoshop Presets/Scripts folder:
- Windows:
C:\Program Files\Adobe\Adobe Photoshop [version]\Presets\Scripts - macOS:
/Applications/Adobe Photoshop [version]/Presets/Scripts
- Windows:
- Restart Photoshop.
- Go to File > Scripts > artboardsToPNG to run it.
The script will export each artboard as a separate PNG using Save As, preserving whatever resolution you set in Image > Image Size. It also allows custom naming and output‑folder selection. For power users who export artboards to PNG frequently, this is a reliable way to keep resolution metadata without manual workarounds.
// Simplified pseudocode of the artboardsToPNG approach:
// For each artboard in the document:
//   1. Select the artboard group
//   2. Call SaveAs with PNG options
//   3. The Save As path preserves resolution metadata
// Full script available in the Adobe Community thread (see link above).
Using Export As with Manual PPI Insertion
If you must use Export As (e.g. for its scaling controls), you can manually insert resolution metadata after export. Tools like ExifTool or a quick Photoshop action (open each file, go to Image > Image Size, set resolution to 300 ppi, save) can add the value. This is tedious for many files but works as a fallback.
Tip
For users who frequently export layer-level content (rather than full artboards) and want lossless PNGs without metadata stripping, the script workflow described above can also be adapted via plugins. One such tool, Layerbench, offers a visual plugin panel that exports selected layers as trimmed transparent PNGs while preserving original pixel dimensions — a complementary approach when your export source is individual layers rather than artboard groups.
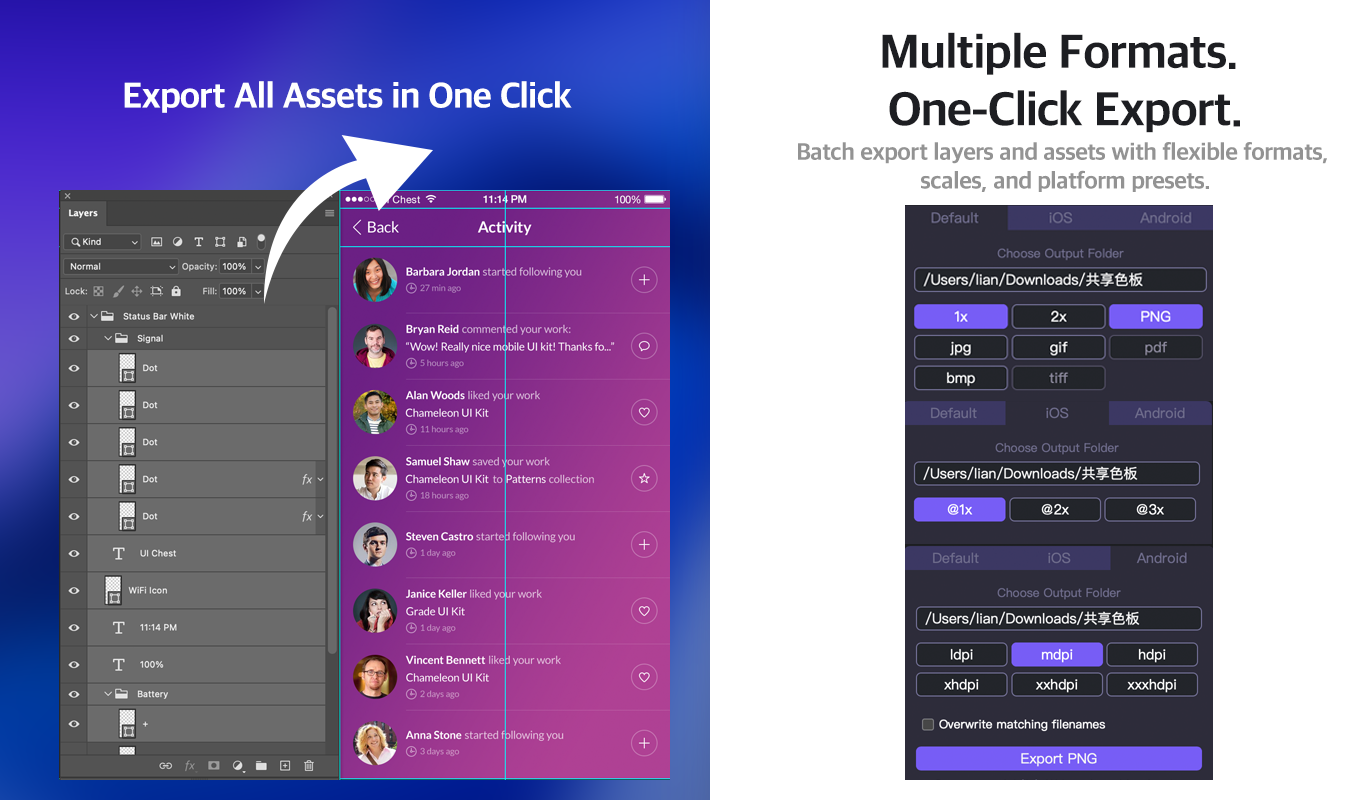
Layerbench — a separate Photoshop plugin: batch-export layers to PNG and other formats with platform presets and multiple scales, each file trimmed to its visible pixels.
Common Artboard Export Headaches and Their Real Solutions
Even experienced designers hit these snags. Each subsection below names the symptom and the fix, drawn from community reports and official documentation.
"Only One Artboard Exports" – Wrong Menu
This confusion comes from using File > Export > Export As, which only offers an "Export All" button when artboards exist. The fix: use File > Export > Artboards To Files and check Export Selected Artboards to limit the output. Alternatively, right‑click individual artboard groups in the Layers panel and export selectively. The StackExchange thread covers this distinction clearly.
"Export Artboards As" Menu Is Greyed Out
After a Photoshop update, the entire File > Export > Artboards To Files item may appear disabled. This is a recurring bug reported in the Adobe Community. Workarounds include:
- Reset preferences: Hold Alt+Ctrl+Shift (Win) or Option+Cmd+Shift (Mac) while launching Photoshop, then confirm reset.
- Restart Photoshop and try again.
- Use an alternate method: right‑click export or the JavaScript script above bypass the menu entirely.
After Updates the Whole Export Workflow Breaks
Same cause as above. Some users report that every second or third Photoshop update introduces a new quirk in the export pipeline. The safest approach is to keep a known‑good export method on hand — typically the right‑click route or the script — so you’re not blocked when the menu fails.
Illustrator Users: Note the Version 24.1 Limitation
This is an Illustrator issue, not a Photoshop one, but it affects designers who use both apps. Illustrator version 24.1 removed the ability to export PNG from multiple artboards. If you previously relied on Illustrator for batch PNG export and upgraded, you may need to switch to Photoshop’s artboard workflow or use a script.
How to Confirm Your PNG Export Worked Correctly
Use this quick checklist after every export to catch the three common failure modes — transparency, resolution, and colour — before the files go to a client or print.
- Transparency check: Open the exported PNG in Photoshop or a browser. If the background is white where it should be transparent, the artboard background was likely opaque. Re‑export using the layer‑selection workaround from the transparent fixes section.
- Resolution check: Right‑click the PNG file, choose Properties > Details (Windows) or Get Info (macOS), and look for "Horizontal resolution" and "Vertical resolution." If it shows 72 ppi and you need 300 ppi, you used Export As — rerun with Save As or the JavaScript script.
- ICC profile check: If colours look noticeably different from your source document, the ICC profile may have been stripped. Re‑export with Export As (which retains the profile) or embed the profile manually via Edit > Assign Profile in a second step.
For most web‑use cases, a 72 ppi PNG without a colour profile is perfectly fine. For print, the combination of Save As (for resolution) and a separate colour‑management pass is the most reliable route. And if artboards continue to cause trouble, the community’s bluntest advice holds: design without artboards when you need transparent PNGs, then use the script or layer export to get the resolution you need.
Final note
The export behaviours described here are based on Photoshop CC 2018 through the current 2026 release. Adobe occasionally changes how metadata is handled across updates — the comparison table and script approach have remained stable through several major versions.